Showing posts with label kale. Show all posts

Thursday, August 7, 2014

Chard Gomae - Less Heat, More Yum

NorthWest Hipster Cooking Word of the Day - Osouzai

"You've probably never heard of it."
A phrase so obnoxious it has become its own joke.  It only happens because we live in the "Google it" age.  The person who said that to you only knows because they Googled it anyway.  (I was looking up something else - but yes, I only know because of Google too.)

Anyway, back to the "too hot to cook" problem.
One thing I have noticed over the years through cookbooks, videos, living and eating in Seattle, and travel - Japanese home cooks often work with:

ONE (1) burner!
And, Yes.  It is one of these portable babies,
with a can of compressed gas.
And they only seem to use  a sauce pan and a small fry pan.  Quickly.  OK... I know there is editing, but still - sheesh - I think I can get out of the kitchen FASTER with out sweating to death. And as I face WARM (for Seattle) weather, I continue to search for better ways to get out of the kitchen faster.

One answer for an "everyday" side dish of greens is the Japanese "sesame sauce" or in Japanese Goma-ae.  This is a pretty easy sesame topping for any ol' tasty, fresh, blanched green vegetable.
Spinach is the classic, but green beans, asparagus, cucumbers, broccoli, gai-lan, Napa cabbage, beet greens, mustard greens, etc. etc. etc....

And thus you get Osouzai - a cold vegetable side dish.

As you can see, I've got some cold pickles as well.
(On any self-respecting Japanese table,
these would be in 4 different bowls/plates.)
Recipes for the quick pickles are the next entry.

Add the sesame sauce and you have Osouzai Goma-ae (cold vegetable side dish with sesame sauce).

Since spinach is such a commodity, and a delicate fragile thing, it usually is not one of the things that shows up in my local Farmers Market or in my CSA box.  The Oxbow Box provided me with both chard and kale.  

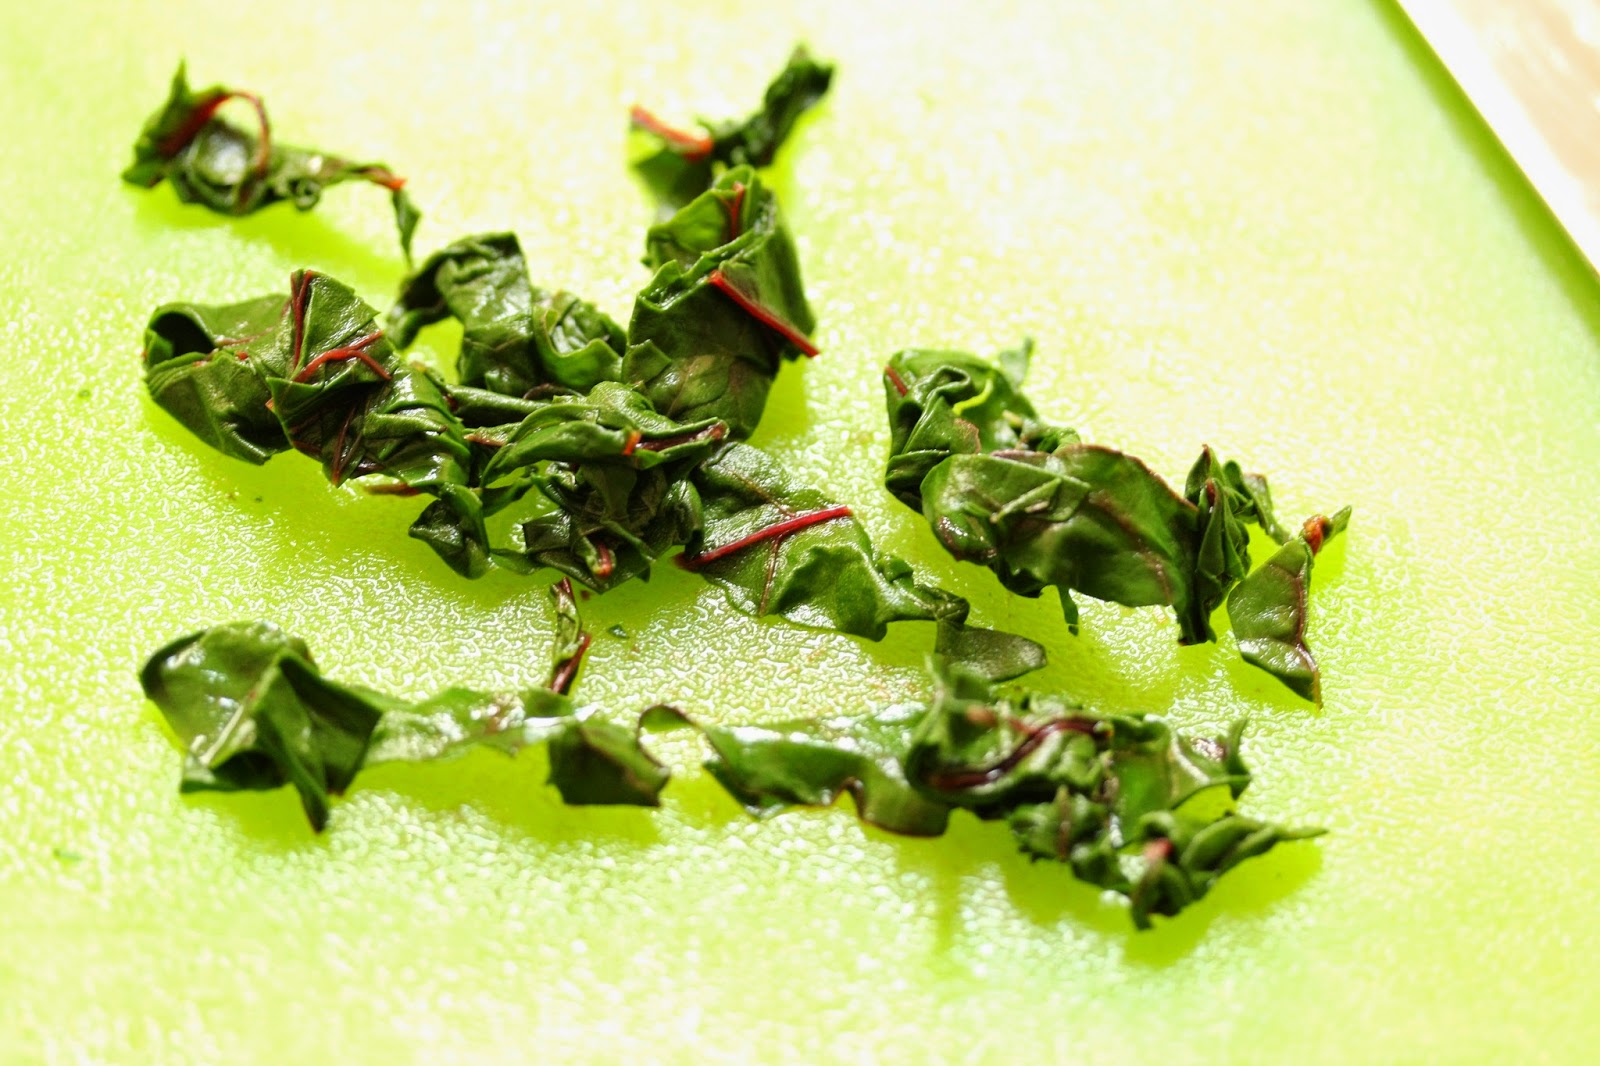
I used the chard in my Oxbow Box for this.

And guess what? A light blanch - in that small sauce pan of water, plus a gentle squeeze turns out to be enough.  

Even better news - these blanched greens are good for a few days in the fridge
So you can blanch all your greens when you get the box, and then use them
during the week.

I roughly chopped it


And gave it a quick toss with the delicious sesame topping. 

And I am out of the kitchen lickety-split.

Less heat & more flavor - just what I was after.  Check out the recipe.  Well - there are 2 recipes.  I'll give you the traditional one, and then the one more US cooks have the ingredients to pull off.  They are both very tasty, just different tasting.

Traditional Goma-ae ( or Gomae) - double this if you want 
(enough to dress a vegetable side dish for about 4 people)

Ingredients:
sesame seeds (white & black are both fine) - 3Tbs
dashi (or water)  - 2 tsp
sugar (brown) - 1 tsp
soy sauce - 1 tsp

Equipment:
small sauté pan
spice grinder/small food processor or Japanese suribachi mortar* (yeah - I don't have one either)
small bowl 
spoon or fork

Prep:
Put the sesame seeds in a dry pan over medium high heat.  

Keep an eye on the temp - well a hand.  When you can feel heat coming up through the pan by hovering your hand over it (about 3-4 min) start stirring the seeds.  When you start to smell toasty sesame seeds, pull them off the heat.

Cook!
When the seeds are cool enough to handle, pour them into your grinding apparatus.  
Grind until they look like ground pepper (stop before you get paste!)


Then stir in the rest of the ingredients.  Ready!
*my thanks to cookandsmile.blogspot.com for their fabulous catalogue of Japanese cooking utensils

Peanut Butter based Goma-ae
(If you have tahini, that'll get you even closer, OR heck, use any nut-butter you have handy.)

Ingredients:
smooth peanut butter - 2 Tbs 
soy sauce  - 2-4 tsp (depends on the saltiness of your peanut butter) 
sugar - 1-2 tsp (depends on the sweetness of your p.b.)
water or dashi - 1 Tbs 
sesame oil - 1 tsp

Equipment:
small bowl
for for mixing
microwave or very small pan

Prep:
Heat the soy sauce, sugar, water and sesame oil in the small bowl/pan.  It should be very hot to the touch, but need not be boiling.

Cook!
Smash and stir the peanut butter into the hot liquid.  Keep working at it until it is smooth.  This can take several minutes, so keep at it and don't despair.
Ta Da!  Delicious sesame peanut dressing.

Toss with your delicious greens.
Thursday, November 8, 2012

Greens in Your Freezer


So I keep nattering on about how you can eat the greens off your beets, radishes, turnips.  But there's a problem with that - if I bought the beets because I want beets, what do I do with the greens so I can eat them later?  Because THEY are going to go bad way before the beets.

Or what about the over abundance of greens that happens at different points in the season?  I have TONS of greens now, and I can't eat them all!

Blanch and freeze my friends, blanch and freeze.  The two biggest reasons why: a) they take up much less space (1lb = about 1C) and b) they won't rot on you while you are distracted by life, pie and that other thing.  The other reason to blanch and freeze?  You can take an overabundance now - and carry it over to lean times later.  (That was the purpose of sauerkraut, kim-chi and other fermented pickles back in the pre-refrigerator/freezer days).

So - chop off those beet tops, gather up the kale, trim the rest of those hardy mustard greens and chard, and lets roll this out.

Blanch - for Freezing
Wondering what to  for what to do with the frozen goodies?  
Check out Dawn's Spinach
It works for all the greens after they are blanched, frozen and rethawed

Equipment:
large pot w/ lid
sink or giant bowl of water - for washing
bowl or similar for placing cleaned leaves - if you are working through a bunch
large bowl - for cold shocking
retrieval utensil - tongs, slotted spoon, small sieve on a long handle - something for pulling the leaves out of the hot water
salad spinner - optional
small freezer safe containers - zip-top freezer bags are especially nice
sharpie pen for labeling

Ingredients:
lotsa' leaves
water
salt
ice cubes

Prep:
Fill the large pot about 2/3 full with water, cover it and place over high heat to bring it to a boil.
Wash your leaves, and move the cleaned ones to a holding area (no need to dry them).
If the stems of the greens are edible, leave them in.  If they are woody (like kale or collards), grasp one end of the stem and use the other hand to strip the leaf off the stem.
Fill the large "cold-shock" bowl half way with ice cubes.  Add water to about half full as well.

Cook!
Once the water comes to a boil, add about a Tbs of salt, and put about 2 very-large handfuls of leaves into the water.  Use the retrieval device (tongs, spoon, etc.) to push them under.  After about a minute*, fish them out with said device and move them to the ice water. 

When they are chilled and clearly no longer cooking, move them to the salad spinner, spin them to a dry-ish state.
Place appropriate amounts in the small containers.  Label them.
Pop them in the freezer for future use.  IF you are really thinking, freeze them flat in the zip top bags.  Then they can be stacked or line up in your freezer.

*How long to blanch different leaves:

Spinach - 45 sec.
Chard - 1 min
Kale - tender/flat - 2 min
Kale - curly/thick - 4 min
Mustard Greens - 2 min
Mystery greens - use your judgement based on how tough it seems to be.
Bonus:
Brussels Sprouts - whole 5 minutes, half about 2.5 min. (Gets rid of the "stinky" and makes them friendlier to bake, sauté, (batter and deep fry!?)
Green Beans - 3 minutes
Snow Peas/edible Pea Pods - 2 minutes
Shelled Peas - 1 minute
Fava Beans (and similar old world "shelling beans") 2-3 minutes (depends on the size - when they slide  out of the membrane around the bean easily they are ready)
Broccoli - 1-2inch size florets - 4-6 min (larger - a bit longer.  Go by color change)

Gotta go clean out MY freezer,  it is a serious source of chaos points.
Not choosing a freezer I can't put a half sheet pan in.
Ever.

Saturday, March 3, 2012

Making Better (Chicken) Soup

Last week started with one of those rotisserie chickens.  I wondered why I don't buy them more often.  When I do, it seems like half my kitchen time disappears.  Boom! Dinner is almost instantly ready.

Oh right, I can only eat chicken all week every once in a while.
Lets face it - this is using far less energy per chicken
than if I were to cook it at home.

But when I do get one of those chickens -

Step 1 - Breast meat gets eaten first.  This lean mean dries out the fastest, so enjoy it at it's juiciest.  This time it got stirred in with a beurre rouge (red-wine butter sauce - which I had time to monkey with since the chicken was all cooked) and herby pasta.  Then lots of vinegary greens on the side.


Step 2 - Shred all the rest of the meat for fast access for the rest of the week.  I make 2 piles - larger pieces for sandwiches, etc. and smaller fussy pieces and all the juices in another for soup.

Step 3 - House favorite sandwiches.  Here that means chicken and swiss on flat bread.


Step 4 - And I hadn't done this in way too long - make soup!

It has actually been quite a while since I made soup from leftovers, and had forgotten just how darn simple it is.  Happily my recent cooking adventures have taught me a few tricks and this soup turned out much better than the variety I had stopped making.

Better Chicken Soup:
I went basically minestrone, but with chicken instead of beans.

How to make better soup?  Cook your vegetables so they are tasty!  Badly cooked vegetables are at the root of so many unenjoyable meals.  Develop the flavor in your vegetables when you cook them, don't just get them hot.  Anne Burrell really drives the point home when making her Pasta Bolognese.


Equipment:
soup pot
cutting board
knife
long spoon
(ladle - optional)

Ingredients:


lazy!  but tasty


Who knew?
Big bags of baby kales at Costco! 
when the freezer is empty
Dried herbs do great things for soups

1 C (or so) left over cooked chicken (bite sized pieces - dark meat is best)
4 - 8 C kale or other dark greens (spinach, chard)

1 Tbs Italian seasoning (basil, oregano, marjoram, thyme rosemary, savory & sage)
1 14oz can diced tomatoes (or equivalent)
1 Tbs oil
3 garlic cloves
1/2 large onion
1 C cooked small pasta (or rice/barley) or 1/2 C uncooked small pasta (shells, broken spaghetti, cous cous)
4 C chicken stock/broth
salt & pepper
(hard italian cheese & tasty olive oil for a fancy finish)


Prep:

Make sure the chicken is bite sized.   Wash the greens and strip the leaves off the tough stems (or get the baby kales!)  Cut or tear the leaves into palm-sized pieces.  Smash, peel and finely chop the garlic.  Cut the onion into smallish pieces. (Cut in thirds toward the root end, and the then slice thinly).
Open the can of tomatoes.  Drain most of the juice out of the can (add it to your broth, or toss it) and have the drained tomatoes ready to add to the soup.

Cook!

Heat the soup pot with the oil over medium high heat (I used bacon fat because it adds so much flavor.  A chopped up slice of bacon or two would also do a great job here as well.)  A sliver of onion in the pot will let you know when the oil is heated up and ready to go (by sizzling), usually about 4 minutes.
Add all the onion and stir over the heat for about 6 minutes - until the onion starts to soften and get a few brown edges.  Add the chopped garlic and Tbs of herbs.  Stir in for a few sizzles, then add the drained tomatoes.  Cook all the plant matter for about 10 minutes - until things look dry-ish and have a few browned spots.*
Stir in about a cup of stock, then add the kale.  Stir until all the kale is wilted and tiny.
Stir in the pasta and the rest of the broth.   Place a low boil if the pasta is uncooked - until the pasta gets cooked.
When the pasta is cooked, add the chicken and cook until the chicken is hot all the way through (just a few more minutes).


Ta-da better soup.


If you want to make this a little more special - grate some parmesan over the top, and drizzle a little tasty olive oil over the top.  Yum!

snobby oil, non-snobby price


We had this with cheesy garlic bread roasted under the broiler.


* Why all this vegetable browning?  It makes the most of the cooked flavors of the plants by driving out excess water and  caramelizing - or gently burning - the sugar inside them.
Adding vegetables to broth to cook is the same as boiling them.  It makes them water logged and often mushy and unpleasant.  Cooking them dry-ish, this way, is more like roasting or grilling them, and creates more flavors rather than stealing them away.

Thursday, October 27, 2011

It's Cold Baby... Bake Me Somethin' Good and Warm

This morning had a gorgeous sunrise - a good while AFTER I was up.
And when we walked to school, we could see our breath.
(This is going to be one of these silly conversational posts - here's just the recipe for Roasted Root Veggies.)

Are We being spoken of?


And I am loosing patience with the cat as he lingers at the door deciding, "how long do I sit here before she closes the door in my face."

Ok, I don't actually know what my cat is thinking, but I am more impatient when my toes are getting cold while he's doing it, and I swear he's taking longer about it.


All of this means Fall is here.
And I want something warm, cozy and full of flavor.
And we got one of the last CSA bags of the season full of roots of all sorts.

carrots, beets, parsnips, potatoes & onions
and some kale & sage - yes I know, those are leaves.
Roots!  Isn't that a bunch of stuff that grows underground?
Like, in the dirt?

"Mom, your build up to introduce beets isn't fooling anyone.  You are going to try to convince people to eat beets."

"Well, kale and parsnips too." "Hey, I don't know how to type that noise."  "Or that one."


"And mom, you know cooking carrots ruins them.  Ruins them!"

"Not always."

"Does so."

"Look - you're going to have to take a..."

"I know I know, a no thank you bite.  kkKkKKkkkkkKKk."


Anyway, I'm starting with a pile of vegetables.  And I'm not even going to pretend, all that rinsing and peeling and chopping, along with the other prep happens in a flash.  It doesn't.  It will take time, and make a pile of peelings.

Cooked root veggies freeze GREAT!  Especially par-cooked.  Why do you think the freezer isle at the grocery store has an entire "potatoes" section.

So I am taking on this pile once to make lots of...

"Boring!  Yes, very good cook once, eat lots.  Get it."

"Aren't you impatient."

"Hungry."

Alrighty Then.  The root veggies get turned into chunks, the beets thinner, 'cuz they are the toughest.
Salt and oil on a sheet pan at 425˚F.


"See always with the 425˚F.  What's wrong with 350?"

"Better for baking.  I like the hint of a crispy edge on my parsnip."

For 20 minutes.

"How are you going to work in the bacon drippings?  You know most people just throw away their dirty used grease."

"Hey, that grease hasn't been used.  The bacon had too much, the stuff in the dish in my fridge is what it couldn't use.  And it's not dirty, just seasoned.  And I'm going to use it with the sage and kale.  And chicken stock.  So there."

When you get everything par cooked - Tupperware!

"Isn't that just a brand name, that you happen to not be using?"

"It works if everyone knows what I'm talking about."

"Until the Tupperware police come and get you."

Anyway... do this:

 3 servings.  1 for now, 2 for the freezer.

To finish all of them, all parts - the root veg, the kale, the herbs.  Stir in a little vinegar and bake at 425˚F until super tasty.

Truffle salt may be good here too for finishing it off.

"It's not optional.  That thing you did with the frozen ones with the rice vinegar and soy sauce wasn't as good.  Truffle salt all the way.  OK.  The carrots weren't ruined.  I still like them raw better though."

Fall Roasted Root Veggies

Just want to bake some steal-out-of-the-pan good root veggies with out all the drama?
This is very definitely a use what you have kinda recipe.

The two secrets - 1) removing water from root veggies creates more intense flavors,
2) cooking at a higher heat breaks down the natural starches and sugars to make yummy brown flavors (OK, it caramelizes them.  I hate how that word has been overexposed and overused of late.)

Here ya' go.

Roasted Root Veg

Equipment:
knife
cutting board
vegetable peeler
baking sheet
sauté pan w/ a lid
(snap top container - for freezing extra servings)

Ingredients:
12 - 15 root vegetables (include starchy, sweet & earthy if you can)
Choose From
-potatoes
-beets
-parsnips
-onions
-carrots

a drizzle of salt
2 tsp oil


small handful sage
(& I had parsley too - so a big one of parsley)
2 tsp bacon drippings (or oil, or butter)
1/4 - 1/2 C chicken stock/water

1 lb (+/-) hearty leafy dark greens
Choose From
-kale
-collards
-chard
-beet greens
-mustard greens are good too if you like that kick.
(stay away from the cabbage-y stuff for this.)

balsamic vinegar - 1 Tbs per baking pan.
truffle salt - to taste (sprinkle, stir, taste, repeat until perfect)

Prep:
All the root veg.  Rinse them off so they are not muddy.
Cut off the fuzzy roots (let your parsnips stay pointy!) and any other parts you wouldn't want to eat.
Peel off the tough outer skin with your vegetable peeler.
Cut up the veg into bite size pieces, and make the beets thinner, since they are tougher and need more cooking.  The onion pieces can be a bit larger.


Place these on your baking sheets
(I had 2 pans worth!)
Spread them out so they are not stacked.

Sprinkle a bit of oil and salt on your veg, and toss thoroughly (clean hands works great).


Kale, collards and mustard all have a stem
like a stick.  Not yummy.  Pull it out.
Rinse your leaves and herbs well.
Tear the big heavy stems out of your greens (you can just chop up chard, stems and all).  Tear or chop the leaves into pieces hand size or smaller.

The herbs need to be chopped fine.


Cook!
Heat your oven to 425˚F
Pop the veg in for 20 minutes.

While the veg are roasting, heat up your sauté pan with the fat in it.  Toss in a piece of sage, when the pan is warming up over medium high heat.  When it sizzles, stir in the rest of the herbs until they are fragrant.  Toss in the leaves, and get them coated in the fat and herbs.  Stir for a minute or so.
Add the stock, clap on the lid, lower the heat to medium and cook for about 8 minutes.  The leaves need to be limp, but not necessarily cooked to done.

Pull the par-cooked veg out of the oven at the end of 20 minutes and lower the heat to 375˚F.

Combine all the veg.  If you have made a "whole bunch" this is where you cool and freeze servings for later.  See below for the "from frozen" directions.

Toss the veg on the pan with vinegar, and a pinch of the truffle salt.
Back into the oven for 15 more minutes.

Check the veg.  Are they tender?  A tiny bit of browning?  When they get there, pull them out and toss them together in a bowl.  Taste for vinegar and salt.
The sweet of the carrots and/or beets and/or parsnips should be met with a little sour from the vinegar.  And taste for salt - and mysteriousness of the earthy truffle.  Add a little more of either if it is needed.

And suddenly what may have been a bad idea in the frozen section becomes something that gets stolen out of the pan before it gets to the table.

***From Frozen***

Heat your oven to 375˚F
Spread the veg (roots & leaves) out on your pan.
Toss with the Tbs of vinegar and a sprinkle of the truffle salt.
Roast for at least 25 minutes.  Again, check for the browning, and intensified flavor.  When you get there, finish the same way.
Not instant, but darn fast.  And darn good.

Thursday, August 11, 2011

Quick Kale Goodness

I had a request for this one... and realized it is not on the blog.

So, on the fly (sorry no pictures)  But if you want to see what it should look like, Google Images has TONS!

Crispy Kale

Ingredients:
A stack of any Kale leaves (this work well with curly & flat sorts)
a sprinkle of salt
a tsp or so of oil

Equipment:
Large, shallow pan (1/2 sheet pan is my favorite)
Salad spinner (optional)

Prep:
Preheat the oven to 425˚F


Rinse and dry the kale, hold the very bottom of the center rib firmly in one hand.  Wrap the other hand near the bottom of the stem, and pull it towards the top, stripping the leaves off.  Tear them into  palm sized pieces. (At this point you can cover the leaves, and pop them in the fridge for later in the day.)
Drizzle the oil over, and toss to coat all leaves with oil.  Sprinkle with salt - toss again to spread around the salt.

Cook!
Spread the leaves evenly over the large pan.  (If you have lots of leaves or a small pan and end up with more than 2 leaves thick you'll need to do more than one batch.)  Pop the leaves in the hot oven.  At ten minutes and check crispiness.  If the leaves are crispy like chips, you are done.  If they are still a bit floppy, let them cook until the leaves are crispy.

Munch Away!


Variations:

Try season salt

Try steak seasoning

Try different combinations of salts, herbs, and oil to create something amazing!

Try using baby kales, just check 'em at 5 minutes.

Hint from a friend:  Crumble this up and serve over a tomato soup and you'll look like a genius!  (I'd like a creamy one with grilled cheese on the side....)

Another Hint from a different friend:  If you keep burning them, USE A TIMER, or set the oven to 375˚F or even 350˚F if you are just having that kind of life.  It's a forgiving recipe.

Monday, April 11, 2011

Garden has returned!

We interrupt the China & Japan diversion to momentarily get this blog back to where it usually goes.

Between the crummy weather, a bout with pneumonia, and the crummy weather, I was feeling very questionable about reviving the garden.

It's chive time again!
But as I looked out and saw the chives all ready for tonight's fried rice, I took heart.

Oh... and it was really sunny - with blue sky and low wind - high enough temperatures to make me pull off my jacket as I beat the encroaching weeds back (Back! Back I say!).  The warm spell lasted long enough for me to pull up the weed cover, and add some soil goodies.  I need to a bit more compost to the dirt to loosen it up and feed it for the new crops.

Amazing what sun can do.  And not just for the plants.
One kale that held on over the winter.  I'll keep it until new stuff comes in.