Showing posts with label spinach. Show all posts

Thursday, August 7, 2014

Chard Gomae - Less Heat, More Yum

NorthWest Hipster Cooking Word of the Day - Osouzai

"You've probably never heard of it."
A phrase so obnoxious it has become its own joke.  It only happens because we live in the "Google it" age.  The person who said that to you only knows because they Googled it anyway.  (I was looking up something else - but yes, I only know because of Google too.)

Anyway, back to the "too hot to cook" problem.
One thing I have noticed over the years through cookbooks, videos, living and eating in Seattle, and travel - Japanese home cooks often work with:

ONE (1) burner!
And, Yes.  It is one of these portable babies,
with a can of compressed gas.
And they only seem to use  a sauce pan and a small fry pan.  Quickly.  OK... I know there is editing, but still - sheesh - I think I can get out of the kitchen FASTER with out sweating to death. And as I face WARM (for Seattle) weather, I continue to search for better ways to get out of the kitchen faster.

One answer for an "everyday" side dish of greens is the Japanese "sesame sauce" or in Japanese Goma-ae.  This is a pretty easy sesame topping for any ol' tasty, fresh, blanched green vegetable.
Spinach is the classic, but green beans, asparagus, cucumbers, broccoli, gai-lan, Napa cabbage, beet greens, mustard greens, etc. etc. etc....

And thus you get Osouzai - a cold vegetable side dish.

As you can see, I've got some cold pickles as well.
(On any self-respecting Japanese table,
these would be in 4 different bowls/plates.)
Recipes for the quick pickles are the next entry.

Add the sesame sauce and you have Osouzai Goma-ae (cold vegetable side dish with sesame sauce).

Since spinach is such a commodity, and a delicate fragile thing, it usually is not one of the things that shows up in my local Farmers Market or in my CSA box.  The Oxbow Box provided me with both chard and kale.  

I used the chard in my Oxbow Box for this.

And guess what? A light blanch - in that small sauce pan of water, plus a gentle squeeze turns out to be enough.  

Even better news - these blanched greens are good for a few days in the fridge
So you can blanch all your greens when you get the box, and then use them
during the week.

I roughly chopped it


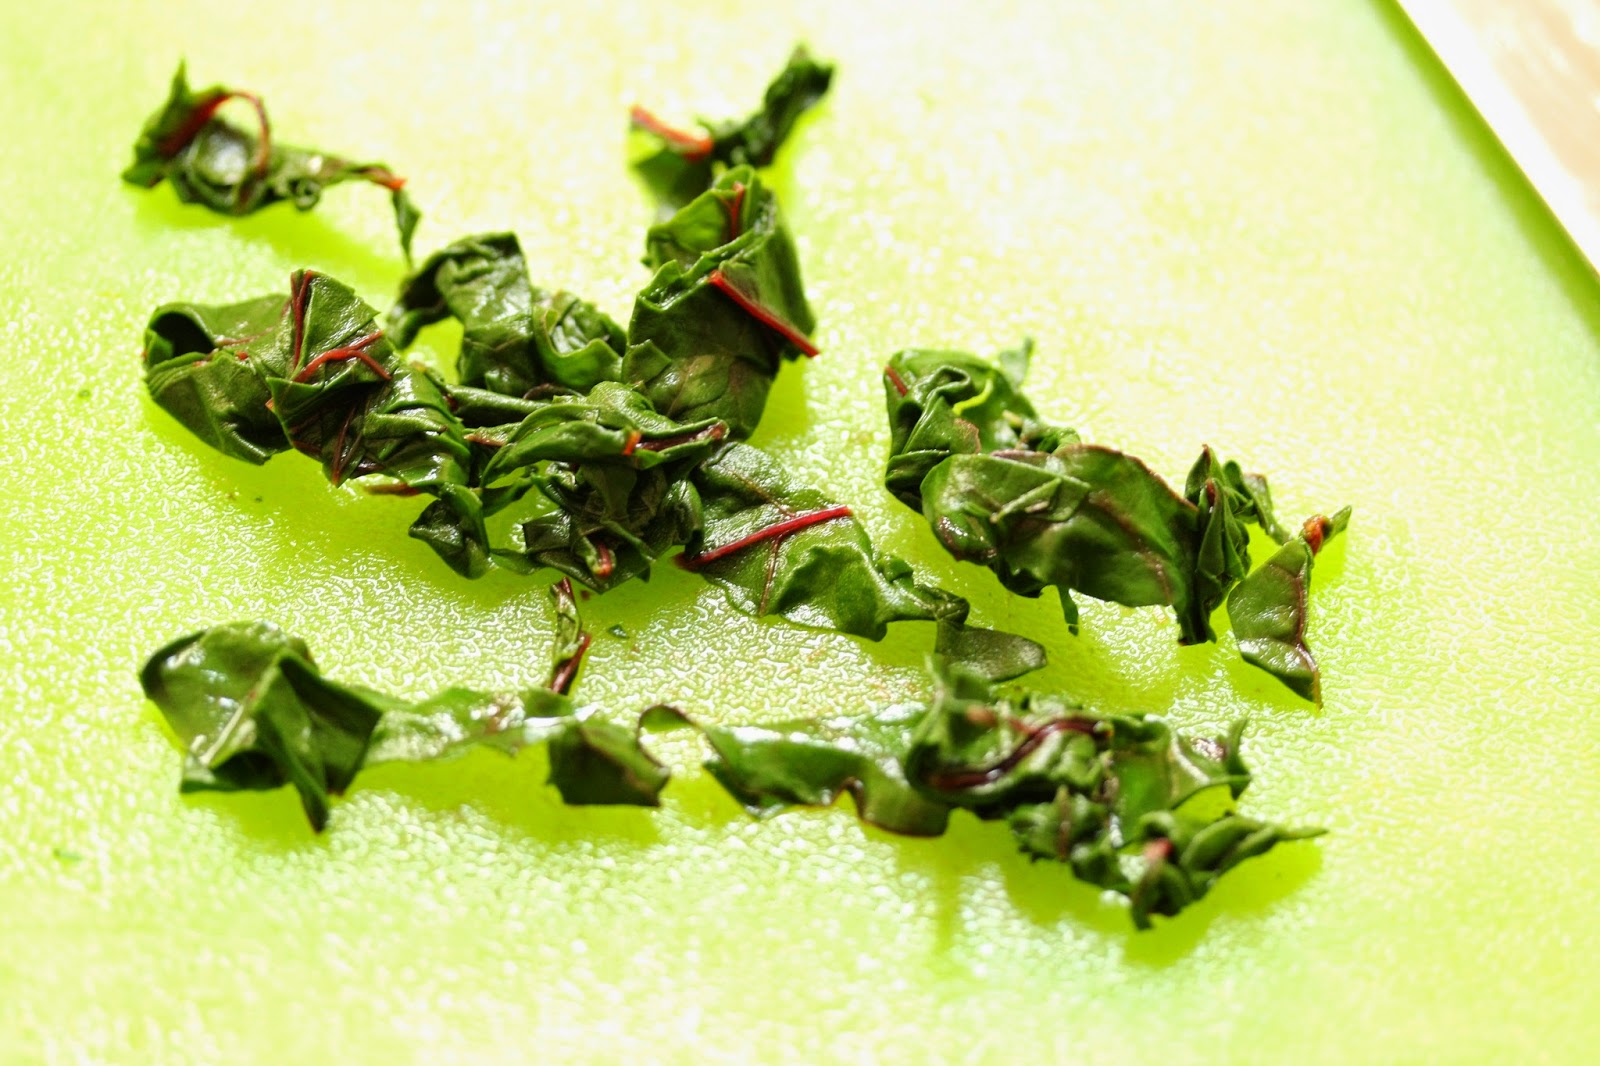
And gave it a quick toss with the delicious sesame topping. 

And I am out of the kitchen lickety-split.

Less heat & more flavor - just what I was after.  Check out the recipe.  Well - there are 2 recipes.  I'll give you the traditional one, and then the one more US cooks have the ingredients to pull off.  They are both very tasty, just different tasting.

Traditional Goma-ae ( or Gomae) - double this if you want 
(enough to dress a vegetable side dish for about 4 people)

Ingredients:
sesame seeds (white & black are both fine) - 3Tbs
dashi (or water)  - 2 tsp
sugar (brown) - 1 tsp
soy sauce - 1 tsp

Equipment:
small sauté pan
spice grinder/small food processor or Japanese suribachi mortar* (yeah - I don't have one either)
small bowl 
spoon or fork

Prep:
Put the sesame seeds in a dry pan over medium high heat.  

Keep an eye on the temp - well a hand.  When you can feel heat coming up through the pan by hovering your hand over it (about 3-4 min) start stirring the seeds.  When you start to smell toasty sesame seeds, pull them off the heat.

Cook!
When the seeds are cool enough to handle, pour them into your grinding apparatus.  
Grind until they look like ground pepper (stop before you get paste!)


Then stir in the rest of the ingredients.  Ready!
*my thanks to cookandsmile.blogspot.com for their fabulous catalogue of Japanese cooking utensils

Peanut Butter based Goma-ae
(If you have tahini, that'll get you even closer, OR heck, use any nut-butter you have handy.)

Ingredients:
smooth peanut butter - 2 Tbs 
soy sauce  - 2-4 tsp (depends on the saltiness of your peanut butter) 
sugar - 1-2 tsp (depends on the sweetness of your p.b.)
water or dashi - 1 Tbs 
sesame oil - 1 tsp

Equipment:
small bowl
for for mixing
microwave or very small pan

Prep:
Heat the soy sauce, sugar, water and sesame oil in the small bowl/pan.  It should be very hot to the touch, but need not be boiling.

Cook!
Smash and stir the peanut butter into the hot liquid.  Keep working at it until it is smooth.  This can take several minutes, so keep at it and don't despair.
Ta Da!  Delicious sesame peanut dressing.

Toss with your delicious greens.

Monday, December 10, 2012

Potatoes & Parsley


Or storage shares and the end of the fresh herbs.

My freezer and other storage areas for food have gotten awfully full at the end of the bumper crop fall – all that sunny weather at the end.  And now I need to get out the row-boat and boots because boy-o-boy is it raining.

So I’m on a kick to use what I have in and around the house – and I currently have a thing for savory sour.  Spanish food is a fun place to look – and somewhere I haven’t looked much.  The storage shares of potatoes and onions from my CSA work in the Spanish milieu, as does the determined, but rapidly drowning parsley in my herb pots.
It might be a little weedy... and mossy,
but I can tell which is the parsley.
Now if you look up this sort of recipe on the internet (and elsewhere) it will be “Papas something.”  One of the most famous versions of this sort of roasted (and sautéed) potato dish is Papas Bravos, potatoes served with a spicy garlicky mayonnaise type sauce (an aioli technically).
Lots of others have tomato based sauces – spicy or mild , and most of the rest have an herby element.   And that is what I’m really after here.  Warm and cozy roasted potatoes with deep flavors, and a little kick at the end – today sour, maybe later spicy.

Since I am working in my kitchen, I have lots of the wrong ingredients.  In this case – Ponzu Sauce.  I used it at the end because my potatoes needed a little more seasoning, a little more of a savory flavor, and a last kick of sour.  Don’t have Ponzu sauce, don’t know what it is?  Don’t let the fancy names intimidate you.  It is basically soy sauce and lime juice, and you can easily sub that in – or any tart citrus.

Now lets get cooking!

Spanish Style Potatoes
(Use up the parsley version - and if you have cilantro, basil, spinach or arugula cluttering up your fridge use them instead)

Equipment:
large pan for the oven
sauté pan for the sauce
spatula for stirring
knife
cutting board
fork – for testing potatoes and eating it all up.

Ingredients:
3 medium – large potatoes
1 medium onion (or ½ a big huge one)
salt & pepper
oil
cider vinegar
a whole bunch of parsley (a big handful?)
Ponzu Sauce (the secret ingredient!)
Prep:
Turn on the oven to 425˚F.
Wash your potatoes vigorously if they need it.
Chop them into chunks about the size of the top joint of your thumb.  (I made some of my pieces too big, and they had tasty outsides but bland insides).  Place them on the large pan, drizzle with 1-2 tsp of oil, sprinkle with salt, and toss with clean hands until they are all coated.
Toss them in the oven – set the timer to 20 minutes.
Turn to the onion.  Cut it in half through the root end.  Peel off the outer dry layers. Make 2 or 3 cuts from near the root end to the tip.  Cut the onion into slices about the width of your pinky.
Rinse the parsley and pull the leaves off the big central stem.  Chop the parsley roughly.

Cook!
Place your sauté pan over medium high heat for about 3 minutes with 1-2 tsp of oil in it.  When a small piece of onion sizzles merrily, the pan is hot.  Add in all the onion and a pinch of salt to help the onions sweat.  (Just a little, you’ll adjust for salt and pepper at the end.)
Stir the onions over the heat.  They should be getting translucent and soft, not really brown (if the edges are blackening, turn down the heat a little!) 

Somewhere in here – the potato timer is going to go off.   When it does, stab one with a fork, and bring it out of the oven.  Cut it in half with a fork, and blow on it until it is cool.  Try a bite.  If it is still a bit crunchy and raw, the potatoes may need up to 15 more minutes (but start with 10).  If the potato is almost done – but not quite – try 5 more.  And if the edges are brown, one surface crispy and puffed, and the inside is soft and fluffy – your potatoes are done.  So cook your potatoes ‘til they get there. 
When they do.  Take them out of the oven and put them to the side.

Back to the onions.  When they get soft and translucent, open a window or turn on a fan.  Then pour in about 1/4C of the cider vinegar.  Cook it down until most of the liquid is gone. 
(Did you add the vinegar without turning on a fan?  Bet you wish you had.)
When the onions are shiny and damp (rather than swimming in a pool of liquid), toss in the parsley, and stir it into the onions.  Then turn the heat to low, and stir in the hot potatoes. 

Taste one.  Add pepper and maybe a little salt if it really bland.
Then break out the Ponzu Sauce, and add about a teaspoon.  Stir it in.  Taste.  Repeat until you have savory, sour potatoes.

Serve with something else yummy.

(A Spanish tortilla, which is a sort of omelet, is nice.  Or spicy sausage and lentils – maybe with a little shrimp?     It makes for a great base to a hash – and the leftovers are great too.)

Thursday, November 8, 2012

Greens in Your Freezer


So I keep nattering on about how you can eat the greens off your beets, radishes, turnips.  But there's a problem with that - if I bought the beets because I want beets, what do I do with the greens so I can eat them later?  Because THEY are going to go bad way before the beets.

Or what about the over abundance of greens that happens at different points in the season?  I have TONS of greens now, and I can't eat them all!

Blanch and freeze my friends, blanch and freeze.  The two biggest reasons why: a) they take up much less space (1lb = about 1C) and b) they won't rot on you while you are distracted by life, pie and that other thing.  The other reason to blanch and freeze?  You can take an overabundance now - and carry it over to lean times later.  (That was the purpose of sauerkraut, kim-chi and other fermented pickles back in the pre-refrigerator/freezer days).

So - chop off those beet tops, gather up the kale, trim the rest of those hardy mustard greens and chard, and lets roll this out.

Blanch - for Freezing
Wondering what to  for what to do with the frozen goodies?  
Check out Dawn's Spinach
It works for all the greens after they are blanched, frozen and rethawed

Equipment:
large pot w/ lid
sink or giant bowl of water - for washing
bowl or similar for placing cleaned leaves - if you are working through a bunch
large bowl - for cold shocking
retrieval utensil - tongs, slotted spoon, small sieve on a long handle - something for pulling the leaves out of the hot water
salad spinner - optional
small freezer safe containers - zip-top freezer bags are especially nice
sharpie pen for labeling

Ingredients:
lotsa' leaves
water
salt
ice cubes

Prep:
Fill the large pot about 2/3 full with water, cover it and place over high heat to bring it to a boil.
Wash your leaves, and move the cleaned ones to a holding area (no need to dry them).
If the stems of the greens are edible, leave them in.  If they are woody (like kale or collards), grasp one end of the stem and use the other hand to strip the leaf off the stem.
Fill the large "cold-shock" bowl half way with ice cubes.  Add water to about half full as well.

Cook!
Once the water comes to a boil, add about a Tbs of salt, and put about 2 very-large handfuls of leaves into the water.  Use the retrieval device (tongs, spoon, etc.) to push them under.  After about a minute*, fish them out with said device and move them to the ice water. 

When they are chilled and clearly no longer cooking, move them to the salad spinner, spin them to a dry-ish state.
Place appropriate amounts in the small containers.  Label them.
Pop them in the freezer for future use.  IF you are really thinking, freeze them flat in the zip top bags.  Then they can be stacked or line up in your freezer.

*How long to blanch different leaves:

Spinach - 45 sec.
Chard - 1 min
Kale - tender/flat - 2 min
Kale - curly/thick - 4 min
Mustard Greens - 2 min
Mystery greens - use your judgement based on how tough it seems to be.
Bonus:
Brussels Sprouts - whole 5 minutes, half about 2.5 min. (Gets rid of the "stinky" and makes them friendlier to bake, sauté, (batter and deep fry!?)
Green Beans - 3 minutes
Snow Peas/edible Pea Pods - 2 minutes
Shelled Peas - 1 minute
Fava Beans (and similar old world "shelling beans") 2-3 minutes (depends on the size - when they slide  out of the membrane around the bean easily they are ready)
Broccoli - 1-2inch size florets - 4-6 min (larger - a bit longer.  Go by color change)

Gotta go clean out MY freezer,  it is a serious source of chaos points.
Not choosing a freezer I can't put a half sheet pan in.
Ever.

Monday, October 29, 2012

Rescuing Spinach


And other dark greens.

How did it get such a bad name?  Well there is the canned version (grey-ish), the over cooked version (slime-ish), and the tough raw kind that squeaks on your teeth (also sandy-ish).  Oh, yeah, and the sautéed baby kind that can taste so (urk) bitter.  And then there was the poison spinach from California.

But spinach does not deserve this kind of press.  The whole point of spinach is that is SO good for you, but tasty and easy too.  And that is where frozen (Thank you Mr.Birdseye) comes in.  First of all, it is already cleaned, chopped and blanched (no sand, softened and that bitterness rinsed out), second so easy to get organic that way, and third and best, if you leave it in your freezer a few extra days/weeks because plans change, it does not melt in the back of your fridge into semi-intelligent slime based life forms.  
            Spinach is one of my very favorite answer to the question, “what veggie to have tonight?” when I just can’t think of anything else.  Besides, if you try this and hate it, you aren’t out very much cash.  Oh, and the reason you’ll never see this on the Food Network? 1) Food people think everyone knows this stuff (we don’t), and 2) there is NO way they could pad this out into a whole show.  It’s too simple and won’t make anyone feel inferior.

            This is the way I was shown back in my much earlier, bumbling cooking days.  Guess what? I still use it as a starting point and a fall back position.

Dawn’s Spinach… with Variations
These are the basics – use it with everything dark green
that’s been blanched and frozen

These amounts are for 1 box/bag of spinach (12 or 16 oz.? not important) 
Only have a partial bag?  Don’t sweat it, use a little less of the other stuff… or not.

Equipment:
skillet/sauté pan + 1 lid
stirring spatula/spoon
knife
cutting board

Ingredients:
1 bag/box frozen spinach
1/4 C water
1 smallish onion (or ½ a big one)
olive oil – enough to moisten skillet
salt and pepper to taste
1 Tbs butter (if you are feeling super fancy)

Cook:
Chop the onion
Heat the skillet and oil over pretty high heat, until a piece of onion starts to sizzle (2 - 4 min)
Dump in the onion, add a pinch of salt and sauté to give it some color – brown around the edges, translucent in the middle.  If it’s turning black, turn down the heat. 
Dump in the spinach and the water
Spread it out over the skillet and clap on the lid for about 4 minutes (This will steam and melt the spinach)
Take off the lid, stir the spinach, add salt and pepper to taste.
If you are feeling fancy, drop in the butter and stir the spinach to make it shiny and extra tasty.
Done!  Was that so hard?

Variations:
Asian
Substitute soy sauce for salt and sesame oil for butter

I Don’t Like Onions
Substitute 1-2 smashed/pressed garlic cloves for the onion
(or 2 tsp bottled minced garlic)


I Love Garlic
Add above garlic to the onions when they are almost done.


I’m Feeling Southern / I Don’t Want Spinach / I’m Sick of Spinach Variation
Substitute frozen mustard and or collard greens, or some blend of spinach/mustard/collard…. hard to go wrong there.


Southern II
Crisp up a piece of bacon cut into small pieces in the oil before adding the onion.  Remove the crispy bacon pieces before adding the onion, and add them in at the end.

Oh NOs!  I have raw leaves.
This work with raw as well - but you might get the bitterness - depending on when/where/how/how long the spinach was grown.

What to do:
Long Way - Blanch and then sauté as above. (Blanch?! What'e Blanch?  check back in, I'll link this in a few days to my Blanching post)
Short Way - stir the raw (rinsed - and torn if they are huge) leaves into the cooked down onion.  A bit at a time as they wilt and shrink.  Then add the water - and proceed with the steaming.  This can take the 4 minutes - or up to 10 or 20 minutes depending on the toughness of your leaves.  (Spinach takes just a few minutes, kale and mustard green takes much longer.)
Taste test for tenderness and bitterness.  When the leaves are a nice texture they are ready.  If they are bitter add some vinegar a splash/tsp at a time.  Rice vinegar, Cider vinegar and Balsamic vinegar all do a good job here.