Showing posts with label chard. Show all posts

Friday, August 8, 2014

Simple Japanese-Style Pickles

Cook once - eat lots... and with a simple preparation that keeps the veggies in great shape for days and days - even 2 weeks.  Wouldn't that be great?

Well, not only is that possible, it is within reach of just about everyone, and takes little or no heat.  With beets, carrots, cabbage and chard stems from my Oxbow CSA box, lets go.

Real quick - pickling may seem hard, or something everyone is doing.  Neither of these reasons should hold you back from picking up the rice vinegar and pickling some of your summer vegetables.

There are many flavors of pickling, and several methods - this is just one.  The fact that this is particularly easy, and it compliments lots of other flavors, makes this a great way to start.

So... onto the show.

Quick Japanese pickles
Top: non-traditional spicy beet pickles
Left: traditional carrot & cabbage pickles
Right: chard stem pickles

The fastest pickles are made with vegetables you'd eat raw anyway.
Some of the reasons I love them:
No heat,
Stay moist and crunchy for days,
Quick addition to dinner, sandwiches (hellloooooo Banh-Mí), and salads.

One con - does take some time.  But if you are doing other things and have a timer, it is worth the investment of your effort, both that day, and on into the future.

 How To:

Cut up your veg - pretty small for this style. For about 4 C of cut veg, sprinkle with 1tsp of salt.  Above I have 2 C carrots and 2 C cabbage.  Let the salt drain the veg for about 20 minutes.  
Squeeze the vegetables gently to remove the drained water.

Last of all:
1/3 C rice vinegar
3 Tbs sugar (white)

Combine everything.  It is ready to go now, and ready for the next week or so.

I kept the vegetables separate to drain (as advised in several Japanese cookbooks), but combining everything when you add the sweetened vinegar is fine.  And no, you don't need to rinse the vegetables since you want some salt in your pickle.  

Any crispy or crunchy vegetable you enjoy eating raw is great for this approach.
Some good vegetables to consider - 
carrots, diakon radish, ANY radish, kohlrabi, peppers, cucumbers, tiny baby zucchini, cabbage,  fennel, sweet onions and red onions.


The next category is vegetables that need a quick blanch/boil - and then a swim in the pickle.
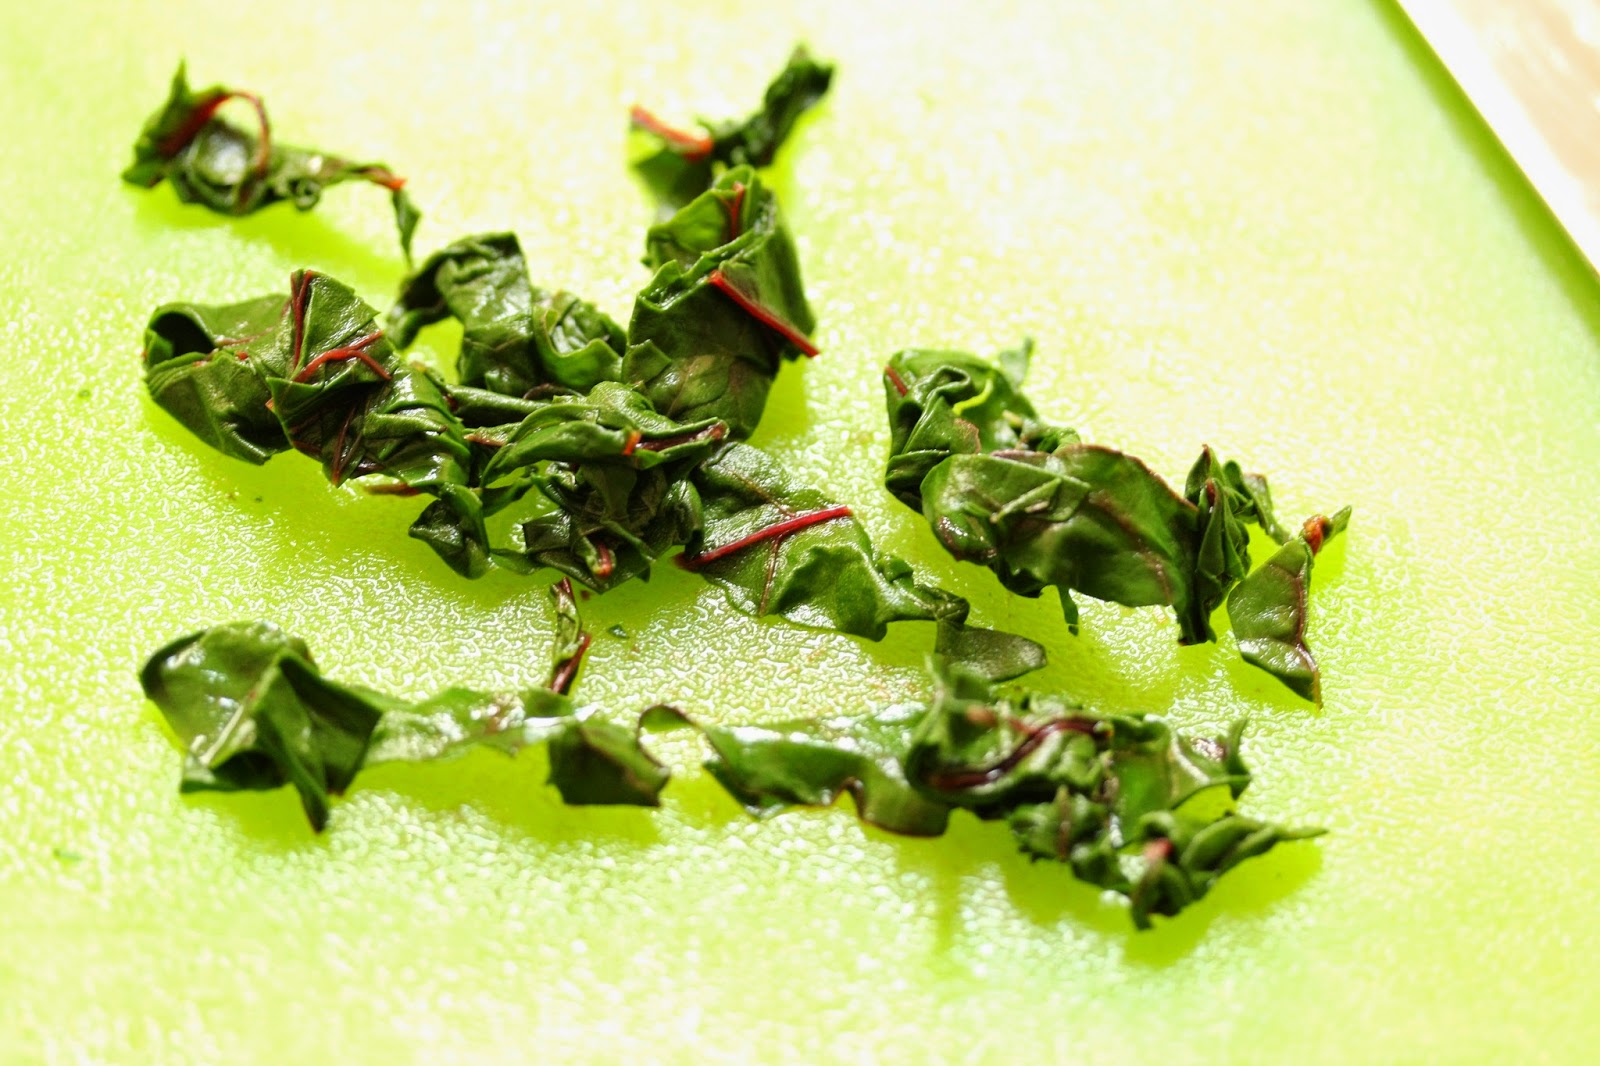
That is what I did with the chard stems.  (They were from the chard that I used for the goma-ae).  The only difference is you put the salt in with the sugar and vinegar.

Choose your vegetable that needs a little cooking, boil it for a few minutes until it is just barely fork tender, drain, then toss it hot into the vinegar, sugar, salt mixture.  Let it sit and cool.  Eat it all up.
(Alternately, you can boil it in the pickling mixture - just double the amount of mixture, and add 1/3 C water)

Some good veggies for this are chard stems, broccoli, cauliflower, asparagus, beets, scapes, sliced winter squash and green beans.

The way I made those beet pickle unconventional was by using a different vinegar - in this case

spicy Filipino vinegar. (The brand Datu Puti is also what to look for if you want to play with Cane Juice Vinegar for Adobo).  And for this one, I cooked the beet IN the vinegar.

Ingredients:
1/3 C Sukang Masssim (or any other vinegar spiced with those evil little chilies)
1/3 C Rice Vinegar
1/3 C water
1 tsp salt
3 Tbs sugar

Beets - peeled and sliced into 1/4 in (or thinner) slices.

Boil the beets IN the pickling liquid for about 20 minutes.  Test with a fork at 15 minutes...
When they are barely fork tender, let them cool (they'll keep softening a bit more as they cool).

And you can spicy-vinegar-up any of these veggies.

Once again - more flavor and little or no heat!

Have fun.

Thursday, August 7, 2014

Chard Gomae - Less Heat, More Yum

NorthWest Hipster Cooking Word of the Day - Osouzai

"You've probably never heard of it."
A phrase so obnoxious it has become its own joke.  It only happens because we live in the "Google it" age.  The person who said that to you only knows because they Googled it anyway.  (I was looking up something else - but yes, I only know because of Google too.)

Anyway, back to the "too hot to cook" problem.
One thing I have noticed over the years through cookbooks, videos, living and eating in Seattle, and travel - Japanese home cooks often work with:

ONE (1) burner!
And, Yes.  It is one of these portable babies,
with a can of compressed gas.
And they only seem to use  a sauce pan and a small fry pan.  Quickly.  OK... I know there is editing, but still - sheesh - I think I can get out of the kitchen FASTER with out sweating to death. And as I face WARM (for Seattle) weather, I continue to search for better ways to get out of the kitchen faster.

One answer for an "everyday" side dish of greens is the Japanese "sesame sauce" or in Japanese Goma-ae.  This is a pretty easy sesame topping for any ol' tasty, fresh, blanched green vegetable.
Spinach is the classic, but green beans, asparagus, cucumbers, broccoli, gai-lan, Napa cabbage, beet greens, mustard greens, etc. etc. etc....

And thus you get Osouzai - a cold vegetable side dish.

As you can see, I've got some cold pickles as well.
(On any self-respecting Japanese table,
these would be in 4 different bowls/plates.)
Recipes for the quick pickles are the next entry.

Add the sesame sauce and you have Osouzai Goma-ae (cold vegetable side dish with sesame sauce).

Since spinach is such a commodity, and a delicate fragile thing, it usually is not one of the things that shows up in my local Farmers Market or in my CSA box.  The Oxbow Box provided me with both chard and kale.  

I used the chard in my Oxbow Box for this.

And guess what? A light blanch - in that small sauce pan of water, plus a gentle squeeze turns out to be enough.  

Even better news - these blanched greens are good for a few days in the fridge
So you can blanch all your greens when you get the box, and then use them
during the week.

I roughly chopped it


And gave it a quick toss with the delicious sesame topping. 

And I am out of the kitchen lickety-split.

Less heat & more flavor - just what I was after.  Check out the recipe.  Well - there are 2 recipes.  I'll give you the traditional one, and then the one more US cooks have the ingredients to pull off.  They are both very tasty, just different tasting.

Traditional Goma-ae ( or Gomae) - double this if you want 
(enough to dress a vegetable side dish for about 4 people)

Ingredients:
sesame seeds (white & black are both fine) - 3Tbs
dashi (or water)  - 2 tsp
sugar (brown) - 1 tsp
soy sauce - 1 tsp

Equipment:
small sauté pan
spice grinder/small food processor or Japanese suribachi mortar* (yeah - I don't have one either)
small bowl 
spoon or fork

Prep:
Put the sesame seeds in a dry pan over medium high heat.  

Keep an eye on the temp - well a hand.  When you can feel heat coming up through the pan by hovering your hand over it (about 3-4 min) start stirring the seeds.  When you start to smell toasty sesame seeds, pull them off the heat.

Cook!
When the seeds are cool enough to handle, pour them into your grinding apparatus.  
Grind until they look like ground pepper (stop before you get paste!)


Then stir in the rest of the ingredients.  Ready!
*my thanks to cookandsmile.blogspot.com for their fabulous catalogue of Japanese cooking utensils

Peanut Butter based Goma-ae
(If you have tahini, that'll get you even closer, OR heck, use any nut-butter you have handy.)

Ingredients:
smooth peanut butter - 2 Tbs 
soy sauce  - 2-4 tsp (depends on the saltiness of your peanut butter) 
sugar - 1-2 tsp (depends on the sweetness of your p.b.)
water or dashi - 1 Tbs 
sesame oil - 1 tsp

Equipment:
small bowl
for for mixing
microwave or very small pan

Prep:
Heat the soy sauce, sugar, water and sesame oil in the small bowl/pan.  It should be very hot to the touch, but need not be boiling.

Cook!
Smash and stir the peanut butter into the hot liquid.  Keep working at it until it is smooth.  This can take several minutes, so keep at it and don't despair.
Ta Da!  Delicious sesame peanut dressing.

Toss with your delicious greens.

Thursday, November 8, 2012

Greens in Your Freezer


So I keep nattering on about how you can eat the greens off your beets, radishes, turnips.  But there's a problem with that - if I bought the beets because I want beets, what do I do with the greens so I can eat them later?  Because THEY are going to go bad way before the beets.

Or what about the over abundance of greens that happens at different points in the season?  I have TONS of greens now, and I can't eat them all!

Blanch and freeze my friends, blanch and freeze.  The two biggest reasons why: a) they take up much less space (1lb = about 1C) and b) they won't rot on you while you are distracted by life, pie and that other thing.  The other reason to blanch and freeze?  You can take an overabundance now - and carry it over to lean times later.  (That was the purpose of sauerkraut, kim-chi and other fermented pickles back in the pre-refrigerator/freezer days).

So - chop off those beet tops, gather up the kale, trim the rest of those hardy mustard greens and chard, and lets roll this out.

Blanch - for Freezing
Wondering what to  for what to do with the frozen goodies?  
Check out Dawn's Spinach
It works for all the greens after they are blanched, frozen and rethawed

Equipment:
large pot w/ lid
sink or giant bowl of water - for washing
bowl or similar for placing cleaned leaves - if you are working through a bunch
large bowl - for cold shocking
retrieval utensil - tongs, slotted spoon, small sieve on a long handle - something for pulling the leaves out of the hot water
salad spinner - optional
small freezer safe containers - zip-top freezer bags are especially nice
sharpie pen for labeling

Ingredients:
lotsa' leaves
water
salt
ice cubes

Prep:
Fill the large pot about 2/3 full with water, cover it and place over high heat to bring it to a boil.
Wash your leaves, and move the cleaned ones to a holding area (no need to dry them).
If the stems of the greens are edible, leave them in.  If they are woody (like kale or collards), grasp one end of the stem and use the other hand to strip the leaf off the stem.
Fill the large "cold-shock" bowl half way with ice cubes.  Add water to about half full as well.

Cook!
Once the water comes to a boil, add about a Tbs of salt, and put about 2 very-large handfuls of leaves into the water.  Use the retrieval device (tongs, spoon, etc.) to push them under.  After about a minute*, fish them out with said device and move them to the ice water. 

When they are chilled and clearly no longer cooking, move them to the salad spinner, spin them to a dry-ish state.
Place appropriate amounts in the small containers.  Label them.
Pop them in the freezer for future use.  IF you are really thinking, freeze them flat in the zip top bags.  Then they can be stacked or line up in your freezer.

*How long to blanch different leaves:

Spinach - 45 sec.
Chard - 1 min
Kale - tender/flat - 2 min
Kale - curly/thick - 4 min
Mustard Greens - 2 min
Mystery greens - use your judgement based on how tough it seems to be.
Bonus:
Brussels Sprouts - whole 5 minutes, half about 2.5 min. (Gets rid of the "stinky" and makes them friendlier to bake, sauté, (batter and deep fry!?)
Green Beans - 3 minutes
Snow Peas/edible Pea Pods - 2 minutes
Shelled Peas - 1 minute
Fava Beans (and similar old world "shelling beans") 2-3 minutes (depends on the size - when they slide  out of the membrane around the bean easily they are ready)
Broccoli - 1-2inch size florets - 4-6 min (larger - a bit longer.  Go by color change)

Gotta go clean out MY freezer,  it is a serious source of chaos points.
Not choosing a freezer I can't put a half sheet pan in.
Ever.

Tuesday, October 18, 2011

Pumpkin-Ground Beef Calzones

Or maybe they are Empanadas?  Nope, not fried, so Calzones.
  (If you are just looking for this recipe... go here ---> Pumpkin-Ground Beef Calzones)
Oh dear... they're not pretty,
but they were so good we ate them all
before we could figure out a pretty picture

The challenge at my house has always been a ban on fruit with meat.  So the usually spicy sweet route for pumpkin as an accompaniment to meat was OUT.  Banned.  Disapproved of.

But I love pumpkin, and the creaminess it brings is reminiscent of the best of gravy, so I wasn't willing to give up on pumpkin.  I just needed to make it Not Sweet, also known as Savory.

Fortunately for all the palates concerned, Smoky as a flavor option has come a long way since the days of "Liquid Smoke" and "Gravy Browning."  For the purposes of this recipe, smoked paprika and chipotle peppers (which are ripened, smoked jalepeños) do the trick.

And the beet greens with masses of sautéed garlic was the best bonus.

Step 1 - roast the pumpkin.  A pool of water at the bottom of the pan, as you set it at 375˚F for 30 - 40 min will make it soften right up.  Be sure to use a cute little pie pumpkin.  They have the best taste.  "Big Carvin' Pumpkins" are watery and not for food.

Pull it out when the skin and the edges are starting to brown, and the flesh is fork tender.


Step 2.  Don't toss the pumpkin guts.


Step 3.  Why - because you can make roasted pumpkin seeds!  YAYAYAYAYYAYAY!!!!
(At the same time you are baking the pumpkin)

Normal Person 1: "But I hate getting all those orange ecchchy stings all over my fingers!"

Kitchen Geek: "Me too, but I figured out this cool way to get rid of that problem."

NP1: "You spent time on this?"

KG: "Well, I just like fresh roasted pumpkin seeds that much."

NP2: " What are you two talking about?"

KG: "Well, all you need to do, is put the pumpkin guts..."

NP1: "Why do you keep saying pumpkin guts?"

KG:  "Remember Sally from the Charlie Brown Great Pumpkin Special?"

NP2: "Oh right, when she freaks out from opening up the top of her pumpkin and scooping out the..."

KG:  "Right, so anyway, put the pumpkin guts into a big bowl of water.  If you squeeze the pointy end of the seeds they pop away from the orange stringy things and just float on the water.  Then you can scoop them out."   


Step 4:  Toss them on a cookie sheet/ half sheet pan with a silpat, 
(NP1: "You ARE a Kitchen Geek.")
with a little salt, and just enough oil to coat them lightly.  Bake at 375˚F until lightly browned and crunchy (25 - 40 min... depending).  And as far as I'm concerned that's the point of Halloween.
(NP2: "Total Geek.")


KG:  "HEY! Who ate all but a handful of the roasted pumpkin seeds?  Huh!?" 

Anyway, Step 5:

Heat a saute pan, cook down a sliced onion (purple if you got 'em) and some sage in a little bacon fat (or oil) over med-low heat, until the onions are soft.  Brown a pound of ground beef, and 
Add Chili powder (Start w/ 2 tsp)
Smoked Paprika (Start w/ 1 tsp)
Garlic Powder (Start w/ 1 tsp)
Salt & Pepper (start w/ 1/4 tsp)
until it tastes almost right. 

Then stir in the pumpkin pulp you scooped off the skin after it cooled enough to handle.


Mash it up and stir it into the seasoned ground beef and purple onions.  Taste and adjust the seasonings until it makes you want to eat it all up right there.


Step 6:  Restrain Yourself.

Get that bag of pizza dough from Trader Joe's you bought earlier today.

NP1: "Wait, so you bought a pie pumpkin, a pound of ground beef and pizza dough at Trader Joe's today?"

KG: "Well, I didn't have much a choice did I?"

NP2: "Next you are going to tell us you were stopped in your tracks by these items."

KG: "Well, it was all the pumpkins that did it.  I see the other 2 things all the time."

NP1 & NP2:  "You are just not normal."


KG: "Do you want dinner?"

OK, anyway.  Get a clean expanse of counter very floury.  Divide up the dough into 6 pieces.  Make them into small circles.  Put A few tablespoons of the pumpkin-beef filling into the center.  Fold the circle onto itself, seal the edge by pressing down emphatically.  Fork tines help.  Repeat with other dough circles.

Stab a few times to let air escape.  Place on a cookie sheet (or appropriate alternative) in the 375˚F oven for about 30 min. That is until dough is in a GBD state (Golden Brown & Delicious).

While the Calzones are cooking...

Step 7:  Vegetables
Wash & tear some green stuff.  I had beet greens.  Chard, spinach & tender kale are all good here too
.

Saute with large amounts of well chopped or thinly sliced garlic.  Add broth or water and let simmer until all is tender and mild.  Don't forget the salt.


And then make a dipping sauce.  Basically take a nice plain Marinara or similar, and stir in some chopped chipotles in adobo... or chipotle salsa.

Sunday, August 9, 2009

Good to be Spoiled by Summer

A quick side note - one reason living in Seattle IS SO AWESOME is that Summer is a Food Bonanza. The farmers market within walking distance of my house (Lake Forest Park Farmer's Market) is now capable of providing a ridiculous, amazing, totally American, totally local, scrumptiously awesome summer feast.

And thus we had picked this morning yellow & white corn, swiss chard, smashed potatoes (some heirloom variety!) and grass-fed beef from Covington, WA.
I had butter, shallots, onions, salt, pepper, oil & vinegar at home along with my ever-growing herb supply (literally these days). But I could have gotten butter, shallots, herbs and even vinegar from the local folks!
I'm glad all these people are doing well at the farmer's market... because I DO LOVE this Fresh Food.

One for the road...
Tarragon-Chive Butter to go with your Steak:

Soften 4 Tbs unsalted butter.
Chop up too much tarragon and chives.
Add this, with some salt to your taste.

Use the left over herbs in your pan sauce and sprinkle willy-nilly over vegetables and potatoes.