Thursday, December 20, 2012

Christmas Cookies 2012

The kitchen was taken over!

Cheese Crispies & Chocolate Ginger Snaps cooling
Plates of cookies ...
before they get baked


bags and bins


Packed and ready to go!
Last year I had an idea for a cookie.  It was Chocolate Ginger Snap Sandwiches with Nutella Filling.  It turned out...  AMAZING!  And I realized I didn't make enough.

This year - those went down like this:
Almost 900 of the little guys!  Sandwiches require the MOST cookies.

This year the cookie that took hold of my brain was:

Sriracha Chocolate Chip Peanut Butter Cookies.


I was thinking saté sauce for dessert.  But when the cookies aged for a few days, the spice took over the cookie.  It went from an interesting spice to TOO HOT!  Where's the cookie?  How is this dessert?

What - what to do?  So I poked around the internet.  After my Turkey Pot Pie Empanada adventure I was sure it had to be out there - some other ideas about Sriracha peanut butter cookies.  And there were.

Glut Life made an ice cream sandwich with Sriracha Peanut Butter cookies filled with Thai Basil ice cream rolled through toasted cocoanut.

And then I realized that I had definitely left the coconut out.  And the bitterness.  When you get saté, if it has been done right, it will have a char on it.  And the bitterness of those crispy burnt edges are balanced with the sweetness of the saté sauce.  The chili and the coconut and the saltiness - it all has to be there the make the magic.

The result?  Hundreds of cookies dipped in 60% bittersweet chocolate and rolled in sweetened coconut:

Bet you want the recipe!
Here: Sriracha Peanut-Butter Chocolate Chip Cookies
dipped in Bittersweet Chocolate and Sweetened Coconut  


The secret to my cookie success - the bulk bins at Central Market.  I was able to get a bit of different kinds of chocolate, different types of coconut and test them out.  And then go back and get a bunch of the right stuff.
The Russian Tea Cakes were back...  

The ground walnuts are still essential for the correct texture and sweet/bitter balance.  And this year I had a 1 Tbs disher that made scooping out perfect tea cake shapes a breeze.

Speed Cookie dishing this year.
This 1 Tbs size is too big for the bite size cookies...
next year I need a 1 or 1.5 tsp size one!
(The almost 2T size one is perfect for muffins and abelskivers!)

And Cheese Crispies.  I left out the rice crispies this year (the right decision) and left out the garlic powder (the wrong decision).  Look for my 3rd try next year!


Sriracha Peanut Butter Chocolate Chip Cookies

dipped in Bittersweet Chocolate and Coconut


Dang, that is a mouthful.  But the cookies are phenomenal!

The 2012 Cookie of the Year Recipe:

I've put this together as cookie only first - and then dipping ingredients and instructions at the end because that's how you'll do it.

Equipment:
stand mixer
baking sheets
silpat or parchment paper or grease your cookie sheets
measuring cups & spoons
metal spoon (for dishing out the cookies)
small bowl of spare flour for portioning the cookies
cooling racks

Ingredients:*
1/2C butter (room temp if you are thinking ahead)
1/2 C granulated sugar
1/2 C brown sugar

1 C peanut butter
1 egg
1/2 tsp vanila
2 Tbs or up to 1/3C Sriracha

1+1/2C flour
1/2 tsp salt
1/2 tsp baking soda

1C chocolate chips (bittersweet/semi-sweet is best)

Prep:
Measure out and stir together the the flour, salt & soda.

In the stand mixer beat the butter until soft.  Add in the sugar, and beat to fluffy.  Add in the peanut butter and get it incorporated.  Stir in the egg, vanilla and Sriracha.

Slowly add in the dry ingredients (flour etc.) and mix until a smooth sticky batter is formed.  Add in the chocolate chips and let it stir a few times to incorporate them.

Cook!
Preheat the oven to 375˚F (190˚C).

Get your hands floury.  And have a small bowl of flour just for dipping your hands.

For palm sized cookies use about 1 Tbs of dough and roll into approx. 1in. balls.
Place these about 2 in. apart on your covered/greased baking sheet.
Bake for about 12-15 minutes.  Look for an evenly brown bottom, and light browning around the edges.  They should still be soft when you pull them out.  Let them cool for a minute or two before transferring them to cooling racks.

For bite sized cookies use about 1tsp of dough, rolled into a ball about the size of the top joint of your thumb.
Place these about 1 in. apart on the baking sheet. Bake for about 8-10 minutes.  Look for an evenly brown bottom, and light browning around the edges.  They should still be soft when you pull them out.  Let them cool for a minute or two before transferring them to cooling racks.

When they are thoroughly cool (They can be stored in a large tupperware or zip-top bag for a day or two - or frozen if you need to wait for the next weekend), get ready for dipping.

Dipping...
This was my hack - pyrex is fine because there is never
actually any boiling - not even simmering - just "warming" 

Equipment:
a double boiler set up - ideally a bowl that fits snugly inside a pan with a little room for water in the bottom
rubber spatula
container for the coconut
wax or parchment paper
baking sheet (if you only have half sheet pans use them upside down for this)

Ingredients:
3/4lb (340g) 60% cocoa solids bittersweet chocolate - slab  (or a chocolate you find you prefer)
1 lb (450g) sweetened shredded coconut**


Prep:
Get out your cookies - and have them ready to hand.
Clear off a large flat space to let your cookies cool.
Lay out the waxed paper on a baking sheet.  You will be transferring these to the large flat space as they fill up so the chocolate can harden - just slide the wax paper off, and replace with a fresh sheet.

Cut, chip or crush the chocolate into no larger than thumb sized pieces.

Put the amount of water in the bottom of your pan so that it doesn't squish out when you put the bowl in it.  Place in on the lowest setting possible on your stove top.

Pour the coconut in a wide flat container convenient for cookie dipping.

Cook!
This is the cheater/short-cut/clever method for making dipping chocolate - it uses the temper already on/in the chocolate when it's in the bar.  It works for this sort of thing because the chocolate strength and appearance aren't primary.

Add about 3/4 or 7/8 of the chopped chocolate to the warmed bowl.  Stir frequently until the chocolate is melted.  Add in the unmelted chocolate and stir in the unmelted chocolate.  Turn the heat down if you had turned it up, or even off for a few minutes.

Dip a cookie halfway in.  Scrape off the back with the rubber spatula, so only a thin layer remains, and maybe neaten up the bottom edge.

Dip the front face of the cookie in the coconut.

Place it coconut-face down on the wax paper to harden.
Do another and test it for Quality Control.
If you are doing a bunch of cookies, watch the heat and stir your chocolate occasionally.

They'll take about an hour to completely harden for transport.  But enjoy then anytime if they are staying at home!

*Apparently THE PB cookie recipe. Same recipe from 1950's Joy of Cooking replicated everywhere - though sometimes double or tripled.  OK Joy of Cooking has it w/o the Sriracha

**  I tried 3 types of coconut - the large shaved pieces, the fine "macaroon" type and traditional sweetened.  This had the best texture and flavor for my purposes.

Wednesday, December 12, 2012

Why bother with a sous vide for beans?


So, I’ve done a little reading on the sous-vide bean thing, and much of the writing says that there is no real advantage to cooking beans in a sous vide.  My experience says otherwise.  The texture may not change particularly, but there are a few distinct advantages.

1) The amount of liquid the beans are cooked in is reduced a bit, and the amount of time the beans soak is increased a bit, so you can flavor the beans more than in the stove top method – by making very flavorful baths for the beans.

2) By placing multiple canning jars of different beans you can cook several varieties of dried beans all at the same time – even if their cooking times are different.
2a) The canning jar method lets you check on the progress of your beans – and you never need to worry about opening a bag and finding under (or over) done beans.

3) No scorching or boiling over worries – ever.

Sous Vide Beans
Not as fast as a pressure cooker, but another way to cook beans that requires very little attention from the cook.  And this way you can cook beans with different cooking times – all at once.

Equipment:
sous vide – or other water oven
2C or 1Q canning jar for each sort of bean
rings and lids for each jar (need not be “new,” just clean)
jar lifter or waterproof hot pad/oven mitt makes things easier.
 
Ingredients:
bean of choice
water
flavorings of choice
(see below for suggestions)

Prep: 
For 2C Jar
     0.5 C beans - your choice
     1.5 C water
     aromatics and/or herbs

For 1Q jar
     1C beans - your choice
     3C water
     aromatics and/or herbs


For making chili - I used 1 clove garlic, 1 bay leaf, and part of a dried ancho chile in each jar.

1 clove of garlic is likely ALWAYS a good idea, and then add spices as they appear in the dish your beans are destined for.


Cook!

Set your sous vide to 195˚F.
Bean times:
lentils .75 - 1 hr
black beans 3.5 - 4.5 hrs
cranberry beans/navy/Yankee beans 3-4 hrs 
garbanzo/chick peas/ceci beans 5-6 hrs
great northern/kidney/cannellini beans 3.5 - 4.5 hrs
pinto beans 4-5 hrs

Check them at the early end - because you can!


Drain them when they are done - and forward with your recipes.  

Well – now I have a bunch of cooked beans.  Now what do I do?


1. Make chili.  (Yes I know, for many chili has NO beans.  But mine does.)


2.  Make soup


3. Make bean salad

4. Garbanzo bean special :
Make hummus – and if you make it with the hot beans, it becomes especially creamy.

Make Falafel.  How... well, look it up!
(OK... I may get there, but not this week)

Think that worked well?  Check out Yogurt and Caramelized Onions

Happy cold weather cooking!

Monday, December 10, 2012

Potatoes & Parsley


Or storage shares and the end of the fresh herbs.

My freezer and other storage areas for food have gotten awfully full at the end of the bumper crop fall – all that sunny weather at the end.  And now I need to get out the row-boat and boots because boy-o-boy is it raining.

So I’m on a kick to use what I have in and around the house – and I currently have a thing for savory sour.  Spanish food is a fun place to look – and somewhere I haven’t looked much.  The storage shares of potatoes and onions from my CSA work in the Spanish milieu, as does the determined, but rapidly drowning parsley in my herb pots.
It might be a little weedy... and mossy,
but I can tell which is the parsley.
Now if you look up this sort of recipe on the internet (and elsewhere) it will be “Papas something.”  One of the most famous versions of this sort of roasted (and sautéed) potato dish is Papas Bravos, potatoes served with a spicy garlicky mayonnaise type sauce (an aioli technically).
Lots of others have tomato based sauces – spicy or mild , and most of the rest have an herby element.   And that is what I’m really after here.  Warm and cozy roasted potatoes with deep flavors, and a little kick at the end – today sour, maybe later spicy.

Since I am working in my kitchen, I have lots of the wrong ingredients.  In this case – Ponzu Sauce.  I used it at the end because my potatoes needed a little more seasoning, a little more of a savory flavor, and a last kick of sour.  Don’t have Ponzu sauce, don’t know what it is?  Don’t let the fancy names intimidate you.  It is basically soy sauce and lime juice, and you can easily sub that in – or any tart citrus.

Now lets get cooking!

Spanish Style Potatoes
(Use up the parsley version - and if you have cilantro, basil, spinach or arugula cluttering up your fridge use them instead)

Equipment:
large pan for the oven
sauté pan for the sauce
spatula for stirring
knife
cutting board
fork – for testing potatoes and eating it all up.

Ingredients:
3 medium – large potatoes
1 medium onion (or ½ a big huge one)
salt & pepper
oil
cider vinegar
a whole bunch of parsley (a big handful?)
Ponzu Sauce (the secret ingredient!)
Prep:
Turn on the oven to 425˚F.
Wash your potatoes vigorously if they need it.
Chop them into chunks about the size of the top joint of your thumb.  (I made some of my pieces too big, and they had tasty outsides but bland insides).  Place them on the large pan, drizzle with 1-2 tsp of oil, sprinkle with salt, and toss with clean hands until they are all coated.
Toss them in the oven – set the timer to 20 minutes.
Turn to the onion.  Cut it in half through the root end.  Peel off the outer dry layers. Make 2 or 3 cuts from near the root end to the tip.  Cut the onion into slices about the width of your pinky.
Rinse the parsley and pull the leaves off the big central stem.  Chop the parsley roughly.

Cook!
Place your sauté pan over medium high heat for about 3 minutes with 1-2 tsp of oil in it.  When a small piece of onion sizzles merrily, the pan is hot.  Add in all the onion and a pinch of salt to help the onions sweat.  (Just a little, you’ll adjust for salt and pepper at the end.)
Stir the onions over the heat.  They should be getting translucent and soft, not really brown (if the edges are blackening, turn down the heat a little!) 

Somewhere in here – the potato timer is going to go off.   When it does, stab one with a fork, and bring it out of the oven.  Cut it in half with a fork, and blow on it until it is cool.  Try a bite.  If it is still a bit crunchy and raw, the potatoes may need up to 15 more minutes (but start with 10).  If the potato is almost done – but not quite – try 5 more.  And if the edges are brown, one surface crispy and puffed, and the inside is soft and fluffy – your potatoes are done.  So cook your potatoes ‘til they get there. 
When they do.  Take them out of the oven and put them to the side.

Back to the onions.  When they get soft and translucent, open a window or turn on a fan.  Then pour in about 1/4C of the cider vinegar.  Cook it down until most of the liquid is gone. 
(Did you add the vinegar without turning on a fan?  Bet you wish you had.)
When the onions are shiny and damp (rather than swimming in a pool of liquid), toss in the parsley, and stir it into the onions.  Then turn the heat to low, and stir in the hot potatoes. 

Taste one.  Add pepper and maybe a little salt if it really bland.
Then break out the Ponzu Sauce, and add about a teaspoon.  Stir it in.  Taste.  Repeat until you have savory, sour potatoes.

Serve with something else yummy.

(A Spanish tortilla, which is a sort of omelet, is nice.  Or spicy sausage and lentils – maybe with a little shrimp?     It makes for a great base to a hash – and the leftovers are great too.)

Sunday, December 9, 2012

Sushi in the Dark

So, we start to make sushi...  (Condensed story - lived outside of Denver - sushi was far away and $$$ - so Alec learned how to make it a little over 10 years ago.  Been kind of a gateway drug.)

Anyway - the fish was sliced,


and so was the veg

 the rice was in the rice maker.

Then Boom! (well really, "click") the power went out.  Alec stood there - baffled.  "Well, the rice is toast."
"No it's not.  It's just rice.  We can go old school.  Ya know, use fire."


And that's just what we did.  Sushi by candle light.


 NO Broiler?!
Break out the (creme brulée - ok XTra large version we use for torching sous vide meats) torch to crisp the eel.


 Looks cool in the dark!?

And some miso soup.


Which reminded me of part of the awesomeness of Japanese food - perfect no electricity food.  In fact this is a whole cuisine developed in a preindustrial setting - and yet, still brought to high art.  And the general lack of need for ovens helps when the power is down.  Sure, the Japanese love their sweet white bread (anpan/Milk Bread) and other pastries, but those are the imports, their own cuisine goes on without the oven.


And then after the sushi - Pandemic of course.  To complete the apocalyptic theme for the evening. (Are sushi and the apocalypse compatible?)

Monday, December 3, 2012

Teach Pie Early!


Growing up - come Thanksgiving time - the Pumpkin Pie was MINE!  I'm unsure how this tradition started, but it is still here.

Partly, it may have to do with how much I loved eating the raw pie crust, but that's another story.  Functionally it comes down to the fact I started making pie crust before I was mentally equipped to be nervous about the results.  I was just experimenting.  (OK, maybe I never got over that).  But because I was just playing around, I had the time to do it wrong on the way to right.

 That was true for the pie filling as well.  There was the year I left out the eggs.  OOPS!  But my mom simply decided that year the pie was sauce for the ice cream.  It wasn't ruined, it was just different.  It still tasted great, the form had just changed.  (Part of me thinks that was key in my continued kitchen exploration - step 1: make it taste good.  The rest is details.)


But back to the crust.  Because I started working with pie crust before I knew it was an object of fear and loathing, I've never really had trouble with it.  In fact, one year at camp they had a pie making contest and I busted out an apple pie off the top of my head.  

So with that in mind, it was High Time for the offspring to learn pie crust.  A valuable skill out there in the big bad world.

So what makes pie crust (and thus pie) so easy AND so hard?  It is simple - but needs to be adjusted by experience.  It's not a hard and fast ratio like water (H2O - Always 2 hydrogens to 1 water - no matter what).  It is close to a hard and fast ratio - start with 2 C flour and 1 of fat - but then it needs a little adjustment, a little water, don't forget the salt.

And less is more.  Manipulate it less.  Overworking it makes a rock hard crust.  Walking away when it seems sort of unfinished is the key.  And use your hands.  Get floury and buttery.  The crust will come out better for it.

And the key of all keys.  Wrap it and let it rest.

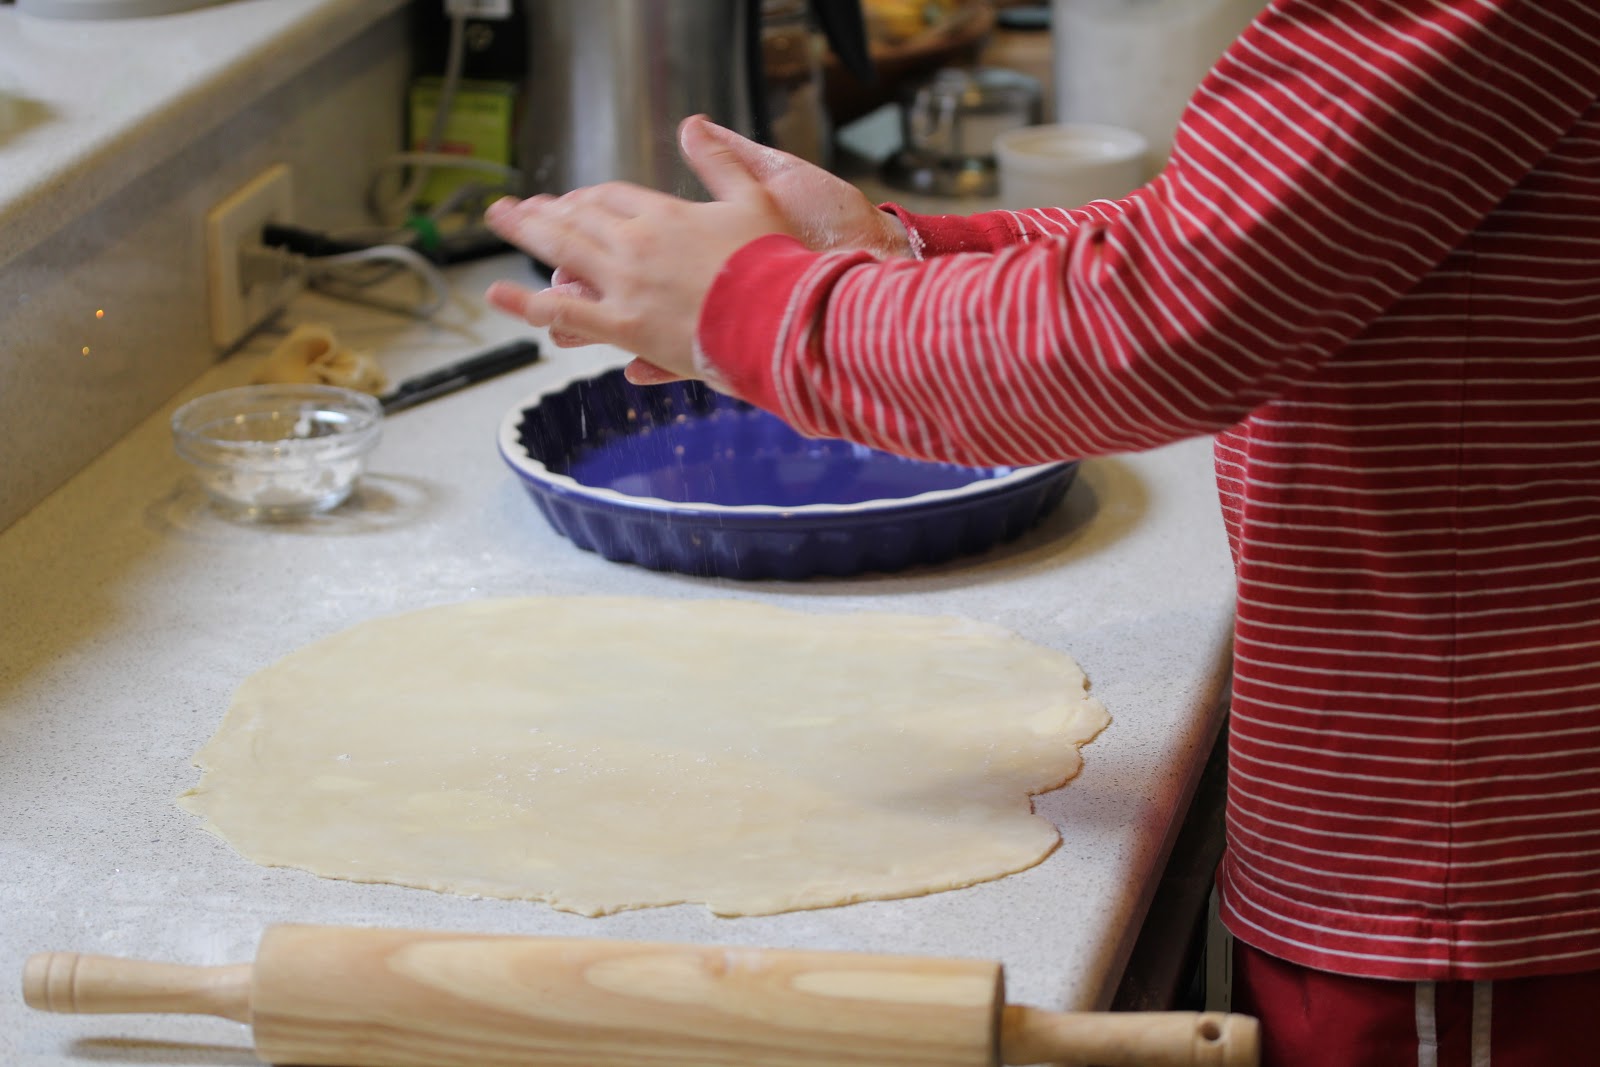
Because if you do that - then your child(ren) can learn to do this:


Oh - and Julia Child's kitchen wisdom recipe (more or less)

For 2 9(ish) inch Pie Crusts

Equipment: 
large bowl
2 butter knives or a pasty cutter
clean hands
square of plastic wrap/wax paper/produce bag/tea towel
very clean, dry counter

And later - 
rolling pin
2 9-ish inch pie pans

Ingredients:
2C flour - if you have it, use 1/2C cake flour and 1.5C AP flour, but don't sweat it if you don't.
1C cold butter (that's 8oz or 2 sticks) Lots of people (inc. JC) swear by 4oz butter + 4oz vegetable shortening or lard.  That works great too, but again what you have is what works best.
1 Tbs + ice water
1tsp salt

Prep:
Scoop up 1 heaping cup of flour.  Level it off with a butter knife.  Dump it into the bowl.  Repeat to get 2 cups of flour.
Pour the flour into a large bowl
Add the salt and stir it in.
Chop the butter (or butter/shortening mix) into large pea sizes.
Dump them into the flour and proceed to cut the butter into smaller and smaller pieces - until the flour looks like coarse corn meal.  Add in the 1 Tbs of ice water - dribbling it all around the flour.
(Can also have the food processor do the above cutting/mixing.) 
Using clean hands, squish the whole thing into a ball, and dump it onto the counter.
Use the heel of your hand to push out a portion of the dough into a "tongue".  Pull it back in.  
Do this about 5 times to get all the loose flour incorporated (more or less).
Smoosh it all back together, cut it in half, and pat together into 2 disks about the size of the circle you can make with your 2 hands together.  Wrap it up.
Let it rest for at least 30 min in the fridge.  Or up to 2 days.  If its going to hang out any longer than that - freeze it.
Roll it Out:
Let fridged dough sit on the counter for 1-5 min (depending on how long its been in there).  Frozen dough needs a solid hour on the counter - or just remember to thaw it in the fridge the night before (I know - I crack myself up sometimes).


Sprinkle flour on the clean, dry counter top, (or a very smooth tea towel), rub some on the rolling pin (device), and get plenty on your hands.  Have flour out to keep things unsticky.  As long as your sprinkle lightly, don't worry about using too much.

Roll out the pie dough.
Sprinkle flour on the clean, dry counter top, (or a very smooth tea towel), rub some on the rolling pin (device), and get plenty on your hands.  Have flour out to keep things unsticky.  As long as your sprinkle lightly, don't worry about using too much.


Try to roll up and down.  Then turn the dough 90˚ (1/4 turn).  
Flip, do this to the other side.  This will keep the dough in a basically circular shape (a rounded rectangle) and fairly even thickness.


Repeat until it is quite a bit bigger than the pie plate - giving room for the pie crust to come all the way up the sides and drape over the edge.


When it's big enough - with floury hands - lift it into the pie plate.  Jiggle it down and either drape it over the edge and cut off the excess.


 If you are feeling fancy, you can pinch the extra into fluted edge - then cut off the extra extra, or even cut out leaves or other shapes and place them around the edge.


Fill it with sweet or savory!