Friday, December 27, 2013

Cookie Catastrophe 2013

Once again it was Christmas Cookie time!

(The cookie recipes aren't linked yet.  The content is here, but the links to the cookie recipes aren't up yet.  Check back in a day or 3)

I had plans - really organized plans.  OK, I meant to have organized plans.

Chocolate Gingersnap Sandwiches


the crazy Sriracha Peanut-Butter Chocolate chip cookies dipped in chocolate & coconut


the Mexican Wedding Cookies/Russian Tea Cakes


The Spiced Pecans

But somewhere things went badly off the rails.  I ended up in (as the boy fondly calls it,) "Mad Scientist  Mode."

It started, I think, with the desire to use up the the rest of the strawberry freezer jam that had fallen to the bottom of the chest freezer.  I made some of those fabulous Linzer cookies. (a cookie version of the Linzer Torte.  Yes… recipe)

They were VERY good.
Buttery crunch with an almond touch
and a hint of European Middles Ages Spice love. 
I only needed to make 2 dozen for a cookie exchange, but if I was going to cook down some of the jam, I was going to do it all.  So-o-o-o-o-o-oooo 150 cookies later, the jam was gone, and I had a bunch of cookies for people.

Oh, and the recipe I pulled together from several sources ended up as one that used egg yolks, but not the white.  So I had whites in the fridge.

And then Alton Brown posted coconut macaroons, which only needed egg whites, and I was off to the store to get chocolate and coconut for the above Sri&PB&CC cookies, so I picked up some of that coconut as well.

And then, I got to thinking (there was the problem).  I got to thinking about the friends who are choosing to eat along different paths - gluten free, vegan, grain free.  I'm an omnivore (except for that soy-milk…urp… thing), but I love to look globally and find solutions to these problems.

This year the Middle East and the Fertile Crescent were calling to me.  I have a beautiful book of Persian recipes I've been dabbling in, given to me by an Iranian friend.


The food is tasty…. but it takes TIME, and INGREDIENTS.   And since I'm a novice at Persian cooking, it even takes more time.

But it is gluten-free heaven, and tons of vegetarian cooking - and use oil instead of ghee/butter - vegan as well.
And over in the desserts, there are a large number of nut and non-grain based cookies.

These beauties are effectively chickpea flour shortbread.  The Persian name is nan-e nokhochi.   The original flavor was rose water & cardamom.  But many American palates read rose water as "I'm eating SOAP!?"  So I altered the flavor to orange (to see how - check out the recipe!) and cardamom.  It became the "Oooh wow!  What is this?  It's good.  I'm not sure what it is, but it is good."

There is also a Persian style macaron - nan-e badami (a version of those very popular pastel colored sandwich cookies that have exploded out of the French Patisserie scene).  Though these are served as single cookies, and are still their natural color - but are that mix of crushed almonds, sugar and whipped egg whites & you choose the spice.

At this point, I was firmly distracted.  Well and truly confused from my original plan.  It had also contained plans for a brittle (we'll not talk of that here - it only makes me sad).

But one more thing.  I had to try altering my Russian Tea Cakes for a vegan audience.  That meant changing out the butter.  Which I did.  With coconut oil.  That is one BRITTLE fat.  The tea cakes worked, but were fragile.  And tasty.  I made them with almonds instead of walnuts which are also more brittle, so that couldn't have helped.

What had begun as a fairly straightforward task had now spiraled out of control.  But in the end nearly everyone who was supposed to got cookies.  I was a mess.  The kitchen was a mess.  But I got to try new things, found a total winner, nan-e nokhochi will be back!


So - if you missed out on cookies this year, I apologize.  Maybe next year I'll be more organized.  That's the plan anyway.  I'll have to go back to the lists I did for the year before.  That was less of a catastrophe, but also less of an adventure.

Happy 2014!

Wednesday, November 20, 2013

Bahn Mí - 1

So I accidentally started this Tour de Bánh Mì.
(See below for "what IS a bánh mì?")†

A couple of years ago I dragged my poor, (at the time, heat shy) innocent son & NC cousin to a báhn mì joint barely a mile from my house (iSandwich 14525 Aurora Ave N, Shoreline, WA).  Good sandwiches, good bread, large slices of jalapeño peppers.

To this day, my now 10 yr old still remembers it as "the 1st time I ate a jalapeño."  (I am lucky that he sees it as a challenge, rather than "I'll never touch spicy food again" moment.)

But then… recently I was on a supply trip up to one of my "local*" Trader Joe's, when hungry, tiny breakfast, "excuse", been-seeing-this-sign-for-last-6-years-and-can't-stand-the-curiosity ANY LONGER, I finally decide to stop in at Yeh Yeh's Vietnamese Sandwiches.

One bite in to that lightly chewy and gently crispy bread, all I could think was "WHY?  Why did I wait so long?" These are really good sandwiches.

Got this far, and realized… whoops
need a snap.


Sure, they cost more than a full meal deal, but here the spiced fries come with curry ketchup.  The bread is that lovely crispy/soft cross, there is no skimping on the vegetables, there are plenty of sauces to choose from (sriracha, red wine vinegar, mystery dark sweet smokey) and the proteins are all tender and well seasoned. (That's right, even the tofu sandwich has oomph.  There is nothing to be gained by neglecting the Buddha and his followers.)

Then I became curious.
Is this the best báhn mì in town?

Given pointers, I stopped in at BooHan Plaza (Hwy 99 btw 225th & 226th) to check out Seattle Deli.
Good news - lots of good looking Vietnamese Pastry, rice noodle encased goodies and sweet rice in banana leaves.
Eeep!  Stuck for a moment when I see the báhn miì names are all in Vietnamese.  Well, having not memorized… I went with the 1st two guessing they were the most popular.  Bingo.  Thit nuong (w/ accents I can't find on my computer) is grilled pork and gá is chicken.  The grilled pork was a very tough thin sort rib slice but the chicken was OK.
(For information on how to NOT look like an idiot when ordering bánh mì - and pho for that matter, go check out lovingpho.com.  Especially "How to Say Bánh Mì" and "Tips on ordering Pho" and "How to Order Pho in Vietnamese")

I'll say, it was pretty tasty, but the bread was pretty hard - crumble and fall apart rather than crispy and chewy.


And the veggies weren't up to par.

Next stop…
Saigon Deli (1237 S Jackson St. -btw S. 12th Ave and S Boren Ave)

Holey Cow!  Now this place has PASTRY… and other food.  And boba and hot food ready to go.
But I'm just here for the sandwich.
Grilled Pork, Char Sui (Red BBQ) Pork and a Xui Mai ("shu my" - meat ball)

Sigh… the char sui was REALLY salty and dry.  The xui mai was very soft, a bit like chopped paté.  And the regular BBQ pork was not bad.  The bread again was hard and brittle, rather than crispy and chewy.  But what made me miss that Yeh Yeh's sandwich was the very scant amount of pickled veg. on top.

So after a couple of disappointments I headed back north, and looked carefully at what impressed me so much the first time.

1) The bread - it is a fluffy yet chewy bread.  They toast it so the crust is crisp, and the bread is warmed, but not so much the bread scrapes your mouth and crumbles.

2) The vegetables - there is a nice stack of pickled daikon and carrots along with the sliced jalapeños and herbs.  And those carrot and daikon threads are lightly pickled with a splash of sweet and chili heat.

3) The meat - every sandwich I've ordered has had plenty of protein on it, and they have been tender and flavorful.  The char sui pork is meaty and flavorful, not salty.  And it has been braising so it is also moist and fall-apart tender in the sandwich.  The chicken was moist and well flavored, the classic grilled pork was the 1st sandwich I had.  The one that knocked my socks off the 1st time.

So - best bánh mì in town?  Not sure, but while I'll keep checking around, I'll also be making regular visits to make sure they don't slack off.

†What's all the fuss?  Bánh Mì ("bunh mee"  I've been saying "bAHn" with that short "ā" for awhile, and everyone was to polite to correct me - or tired of correcting in general) is basically a Vietnamese style submarine sandwich.  They come on a short baguette (of a sort the French would roll their eyes at - but never mind that) slit down one side and stuffed with meat - mostly pork variations (or grilled tofu), a few slices of jalapeño pepper (in the US) a few fresh herbs (mostly cilantro/coriander leaf) and a nice pile of shredded and lightly pickled carrot and daikon (those giant Japanese ones) radish.

They are everything I wished submarined sandwiches could be.  So skip the Subway, and grab and Bánh Mì instead.
 
*Ha!  I live at a nexus of 3 stores all a little too far away.  So I just go to the one closest to the rest of my errands.

Tuesday, November 12, 2013

Fruit Juice Caramel

From Pears to Caramel

The chemistry said it could be done.  And it works.


Here's the short version - and a regular recipe without all the side tracks.

Ingredients:
about 4C (+/-) fresh non-citrus fruit juice - I had a box of pears that I peeled, puréed and strained.  Apples, plums, peaches, pears and the like will all work.
 1-2 Tbs coconut oil or butter
(a sprinkle of salt - optional)

Equipment:
paring knife
cutting board
food processor + strainer* (or a juicer)
sauce pan
tester spoon (regular metal spoon)
soft spatula
slotted spoon/small strainer

Prep:
Juice your fruit.  I seeded and puréed and strained my fruit to get the juice.  I used a jelly bag to strain the juice, though cheese cloth in a colander would work too.  This method takes TIME.  A juicer is faster if you have it.


Cook:
Place your juice in the sauce pan, bring to a gentle boil.  Skim off any large amounts of scum with the slotted spoon or small strainer.


Keep at a gentle boil for 20 - 25 minutes, until you have less than 1/4 of the volume you started with (3/4 - 1/2 C liquid).  Keep and eye out for bubbles to start forming and staying.  When this happens you are approaching caramel.


 When a foam starts to develop, and begins to mount up - you have thickened your juice to syrup.  Turn the heat down, and dip your tester spoon in.  Blow on it to cool.  When it is cool enough to taste - is it a thick syrup?  If so - off the heat.  If not, keep it on the heat, and stir with the soft spatula.
  Keep checking often until you get a thick syrup.  If you start tasting lots of "toast" in your caramel take it off the heat NOW.  You are about to burn it.
Add the Tbs of fat (butter or cocoanut oil).  Stir it in to melt.  Let it cool to thicken, then beat in the melted fat to make a creamy sauce.  Use what you want now, and throw the rest in the fridge for later.


Pear Caramel - an adventure

Caramel is having a moment.  Sort of out there with bacon.  Epitomized by the presence of bacon caramels in 2009 (this example by Suddenly SAHM & not bad.  I made 'em).

And America is having a VERY lo-o-o-o-ong petulant teenager stage.  (We'll show France how to mop up in Indo-China.  What does the rest of the world know about Afghanistan?  Let's show 'em how to not get bogged down.) The latest iteration being, "Tell me fat, salt, nitrites, the crispy browned bits of meat and lots of sugar are bad for me - I'll make bacon caramels.  And eat them.  While reading the nutrition information."

Granted, caramel is beginning to define itself in a new way.  Lately, it has gained a stint as The Poster Child for the crossover of cooking and STEM (science, technology, engineering and math).  Damaged sugar is quite the celebrity.
Harold McGee (On Food and Cooking, Curious Cook) really did a number on some of the accepted wisdom regarding the necessary temperatures for caramelization, and the cooking and creation of caramel.  And possibly created the next food-fad you will never hear of, "aged sugar."

For me, the most interesting thing about the whole sugar ---> caramel thing was the sharing of the result that "sugar" doesn't truly melt.  It is decomposing.  It goes liquid, but it does not retain it's chemical identity the way water or wax does when it melts.  It is turning in to other stuff as it turns into a liquid. If you cool it back to a solid, it is not what it was - the way water would be.

When we say "sugar" in everyday conversation we mean table sugar, or sucrose.  This is a dimer - a two piece molecule - of a fructose and a glucose* hooked together.  Part of what is going on is the fracturing of this bond, maybe some thermal banging up of the chemicals, the release of some water, and maybe some melting of some of the crystals.  Most everything I read uses a term along the lines of "hand-wavey" to discuss the tangled chemistry that ensues.

To be sure there are definite chemical reactions that can be isolated and do happen.  The problem is, there is no single "caramelization" chemical reaction.  It is a whole host of reactions, all happening simultaneously, and the results of one reaction influence the speed and outcome of surrounding reactions.  It is organic chemistry at it's messy, carbon strewn best.  If you want to read more, with diagrams and such, look here: ScienceGeist - The Chemistry of Caramel.

But what all this reading told me was that there is really no reason at all to not try to make caramel from the box of pears I ended up with as a result of my dad leaving for New Zealand for a long trip.

 They weren't ripe when he left, and would be gloppy fruit-fly-heavan when he got back.  So they were mine.  I'm the only one in my house who eats pears.  It's a texture thing, and I'm still trying to get the Philistines to understand the harmony that is fruit and cheese.  Oh, never mind.

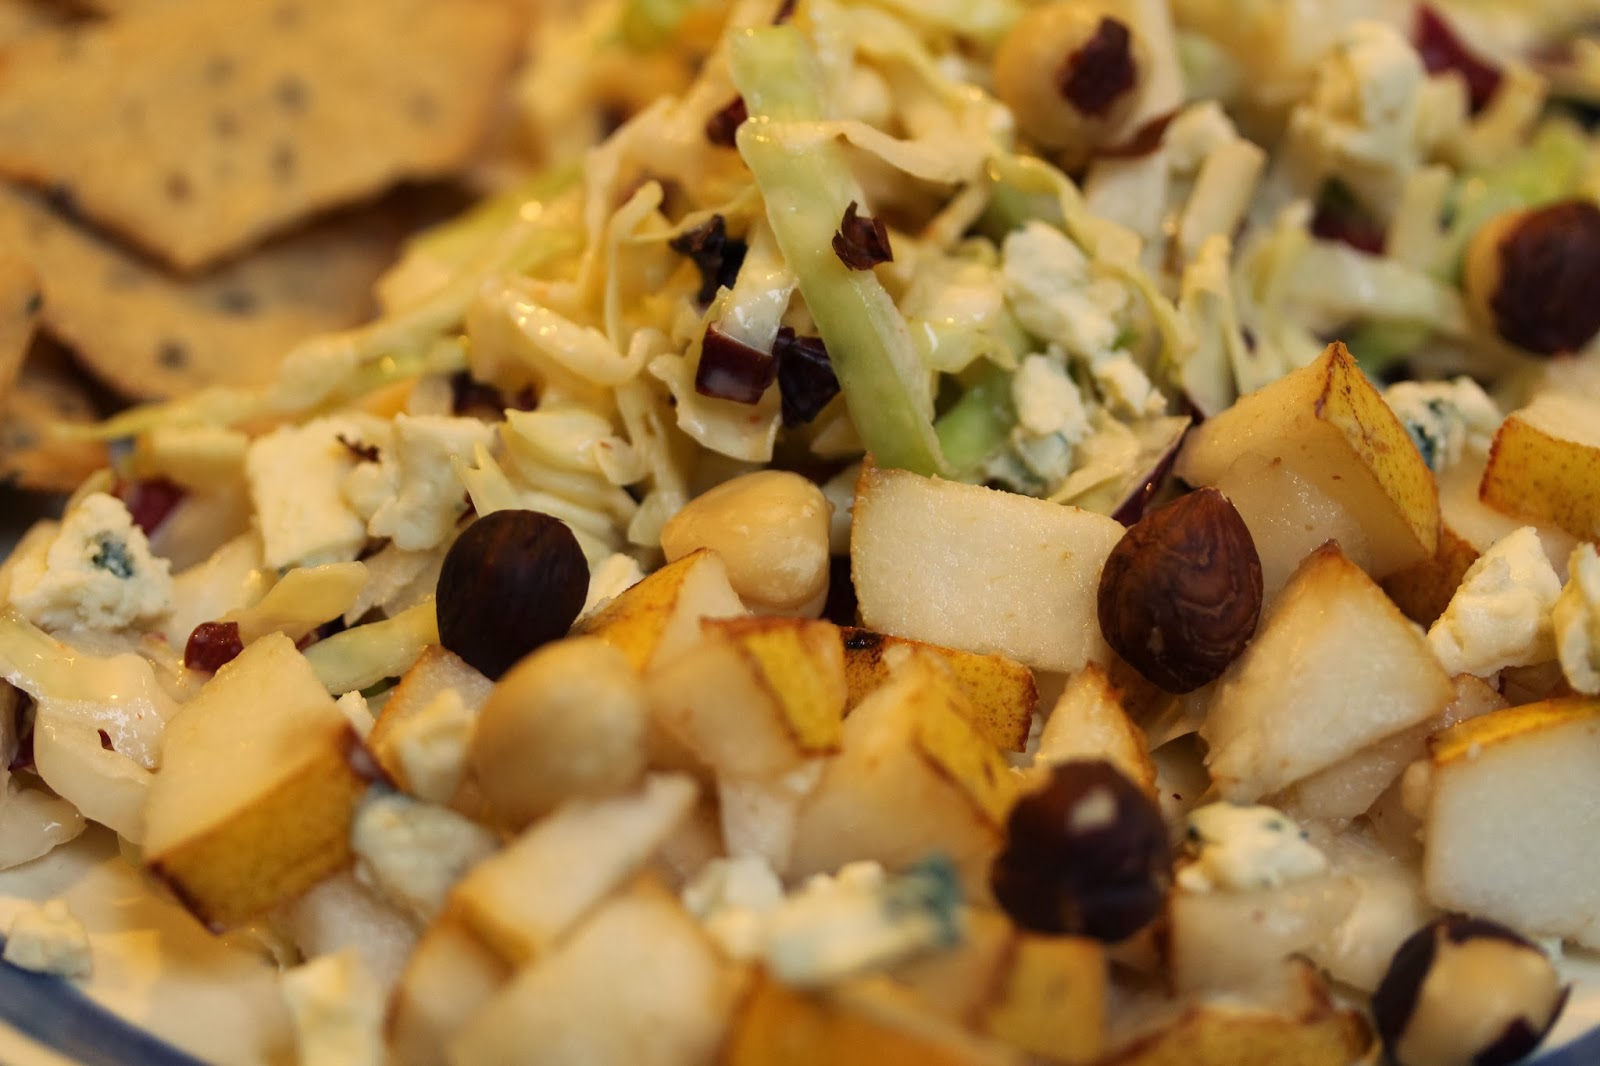
Anyway, I did enjoy a couple of pears the "regular" way.  You know, just part of a composed salad, with blue cheese, hazelnuts, up against a cole slaw with a dressing gently spiked with sriracha.  (1 part sugar, 1 part cider vinegar, 3 parts mayo, sriracha to taste).  Like I said, the regular way.


But there was no way I was going to finish them all myself in good time, and I was curious.  There seemed no reason not to try.  Fructose is important to caramel, and pears are swimming in it.  The degradation of sugar that is required for caramel gets a head start in rose-relative† fruit (apples, pears) thanks to the enzymes.  (That turn-brown-thingy).  And one of the biggest fears in caramel making is the reforming of crystals making the caramel sauce grainy or sandy.  This would NOT be problem when working with pear juice.  It is much to chemically "dirty" to risk the purity of chemicals required to form crystals.  So I forged on.

1. Peel and remove the seeds.

Why peel if I was just going to strain them anyway?  I find the peels have a strong tannin-like flavor.  That flannel, coat the tongue feeling.  Since these are yellow pears, they are not tannins-propper, but there is that effect, and I didn't want that in my caramel.  I also removed the seeds since I would be using the awesome power of the food processor, and didn't want stray, off flavors from the seeds either.

2. Create pear goop.

I was considering using the food mill.  Who was I kidding?

3.  Then I strained the goop through my jelly bag - cheese cloth would have worked too - or a fine mesh sieve.  I ended up with about 5 cups of juice.
Yes - you can see that the enzymes are
going crazy.  I've just let the juice get all
oxygen-y.  And it's gone from nearly white
to pretty much caramel color on its own.

4. Bring it to a low boil to start the evaporation, and the accumulation of scum.
This is what little is left of the nutritiousness
of the original pears.  Most of that (fiber, minerals)
was left in the pulp in the strainer.
That's right.  Don't even try to fool yourself. Just because this is made OF pears doesn't mean it is as good for you AS pears.  Most of the benefits of pears are in the pulp and that scummy stuff.

skim the scum off with a spoon
or strainer
dip the spoon/strainer in a bowl
of cold water to clean it.


The one MAJOR thing is this caramel is (just barely) paleo compliant, and people with digestive inflammation issues can eat it.

It also serves as a valuable object lesson when you see "fruit juice concentrate" in an ingredient list, this is what they have done, this is what they are talking about, and how little fruit is really in there.  I'm not saying don't do it.  I'm just saying don't let the kid snack people fool you.  Fruit juice concentrate has none of the virtues of fruit.

Anyway, back to the chemistry.

5. Boil - at a low boil.  And keep boiling until your 5 cups (or 4 cups or whatever) is down to just under 1/4 of the original volume (so I was down under a cup).
Look for bubbles that hang around.  This means
things are getting sticky.

Warning - Science:

Water boils at 212˚F/100˚C.  You will notice my thermometer says 229˚F.  This means I am starting to get a pretty high concentration of sugar.  I've raised the vapor pressure of the liquid (still mainly water).  A decent proportion of the surface is now inhabited by dissolved sugars.  This means my water molecules need much more energy (in the form of heat) to escape from the pot (i.e. boil).  So instead of all the over 212˚F molecules all being able to escape, thus keeping the pot at 212˚F, they need to gather more energy to escape.  So the boiling point rises.

Fine, when does caramel happen?

6.  Just about here.
Notice the syrup is so thick, there is a definite
foam on top.  The bubbles are forming
faster than they can pop.
When the syrup gets so thick that it foams, you are pretty much there.  You can take it off the heat, and dribble some on a cold plate and see how thick it gets.  Or see if it get syrupy when you blow on a spoon dipped in it.  Going by temperature would be folly.  Again, this is not a solution of known starting components they way traditional sucrose caramel would be, so the temperature at "done" is not a known quantity.

Also notice the line where the juice started.  I have boiled this stuff long past its original form.  It is tasty, but not really related to pears anymore.

7.  Stir in about a Tbs of solid fat.  I went with coconut oil just to follow the Paleo-track to the end.  But butter is more traditional.  Cream would also work.  (Note - it has to be real fat.  "non-dairy creamer" or  a soy replacement will not work.  Those are sugars and proteins and will produce a chemical hodgepodge that would be odd, disappointing, and possibly not yummy.)

Let cool until the caramel is thick enough to emulsify with the fat (will stay together even though they don't really want to, because you've broken the fat up into tiny enough droplets).

When all is said and done - about 2/3 of a cup

8.  Make sure it is real caramel.  Taste test.

The coconut oil was a little pronounced, so a calmed that with a pinch of salt.  Not enough to make it salty - just un-coconutty.
Eating it over a hazelnut shortbread topped with a pear chunk and blue cheese assured me that it really was a caramel.  It has a nice tart touch to it.  That is, the last of it's pear-y essence.


*Fructose - yup, that's right, "fruit sugar." Makes sense too, because we are getting our sucrose from plants - sugar cane or sugar beets.
Glucose - "our sugar" the one all our cells use as their basic food source.  Also known as dextrose.  Yes, 1 chemical, 2 names.  No wonder scientists can get weird.

† Rose-relatives?!  What?  Lots of fruits that have a 5 pointed star cross section are in the same family as roses.  Many of them contain those enzymes that brown their fruit when they are bruised or cut.  Apples and Pears are the ones most familiar to us.

Thursday, October 31, 2013

That's Not a Turnip!

CSA season is over.

But I had these hangers on, chillin' in my vegetable drawers, just bein' roots.
OB-Vious-Ly
celeriac (celery root), turnips, and fennel
I was going to cook them down in the friendly-to-freezing forms.  Roast the celeriac & turnips to give them a toasty bitterness - help balance the sweet they have intrinsically.  More on that in a future post.

Whoops!  Some roots I had blithely assumed were turnips, turned out to be…
A kinda cool thing, you can see that the radish and turnip have a similar radial structure inside.
If I had a white radish and a white turnip
and had to pick them apart on thin cross-section,
 I might be stumped.
But very different texture and smell.

RADISHES!  Watermelon radishes.  Now, to be fair, they were the same size as the turnip, and had the same white with a purple rash on the outside the way the turnip did - but they also had a green blush.  (Does that even make sense?)

But, hmmm change of plans.

Continue on the roasting road for the actual turnip (1 turnip is not enough for soup… unless I add it to the celeriac.  That's a thought.)

Time to pickle my radish!  Yay!

Speaking of cool patterns, look at the shapes the red vessels make in the white.
And the layers…
Makes me think of thai fruit carving.

All chopped up and ready to go!
So I went with the 3rd radish solution - quick-pickled Japanese sweet & sour style.

I'll start eating you tomorrow!
Which just goes to show, even when you think you've got it under control, the funniest things can surprise you.  Today's radish warns me not to get all know-it-ally and complacent.

But since I found kvass the other day, Imperial Kvass no less, that won't happen today.
at Star Fruit & Vegetable
(right next to Yeh Yeh's -should be famous- Vietnamese sandwiches.)

Wednesday, October 30, 2013

Rice Krispie Sculpture

Local, local-local, fresh, tasty, better, blah blah blah…

Somedays, you've just gotta have fun.

Halloween is tomorrow, so I thought I'd whip up a few of these for the boy's class party.


'Cuz if you just can't have some fun.  What's the point?

Really.

Happy Halloween!


Wednesday, October 23, 2013

Pumpkin Food - Lunch

Carnitas, shredded cabbage & carrots
with a base of cumin & jalapeño kraut.
(don't have that?  the Mexican spicy vegetable escabeches
hold much of the same flavors) 

I love sopes.  Love LOVE Luv! them.  But they are a pain in the patoot to make.  I mean mixing the dough isn't so bad, but the frying.  Or the parbaking, and then frying.  Or the parbaking, shaping then frying.  (Aaaaahhhhhhh!)
And they are really only at their best for about 12 minutes.  Then the edges get hard, and they loose their fluffy interior.  And they get a little dense.

Tamales on the other hand have a better shelf life.  And I do enjoy a good tamale as well.  However in Casa de Texture Issues, the mushiness of the tamale masa doesn't go over so well with some of the people I encounter in my house.
And then there's the rage of the tamale snob.  Some of the most enjoyable prose in the "you're doing it wrong" internet-cookery-category comes in the fights over making tamale dough, "the way my Mother-in-Law from (fill in small town/village in Mexico/New Mexico/Texas) does."  And how every other tamale in the whole wide world is just so inferior etc. etc. etc.  And so on.
And then there are the people who don't see why you have to put any fat in tamale dough (because it turns into something with a texture between a rubber ball and a shoe sole, That's Why!)

Well, at the risk of being hounded by the ghosts of a million indignant Abuelas and the internet presences of their strangely numerous Daughters-in-Law, I am going to mess with tradition.

Sopes are just masa and water (maybe a little salt - but probably not).  And while they are fleetingly One of The Most Delicious Things In The World to eat other things on, due to their ingredients, they are quickly on their way to becoming cornstarch hockey pucks.  The fry gets the inside fluffy by turning the water inside to steam, and trapping it within a gently crispy crust of fried corn wonderfulness.  But as the heat leaves, and the steam with it, the poor thing collapses.  It's utter simplicity, making it an ideal vessel for deeply tasty food, also means that it has no internal resources to lean on.

Tamale dough doesn't get dried out anywhere near as badly.  Sure, it is wrapped in that corn husk, and steamed, not fried, but the real trick is the fat.  Even as the water flees, the fat (usually lard) is there to keep things from heading puck-wards.  It traps water, helps the dough retain some structure, and even adds flavor.

So-o-o-o-o-o-o-o-o  what if I gave my sopes a little internal fortitude?  A liquid source that has something more to hold onto, and a nice subtle flavor that already plays well with corn.  And gave them internal fat, to help with the structure problem, and continue to fix the moisture problem.  This could allow me to bake the sopes (much easier in my kitchen, especially from a resource and clean up stand point), and allow them to be frozen and reheated.  

Ta Da!  I present....

(Note: this is a HEAVILY opinionated and thus lengthily annotated recipe.  For the simpler version, skip ahead to: Baked Pumpkin Sopes - Just the Recipe)

Oven Baked Pumpkin Sopes
this recipe makes 12-16 sopes depending on what size a "golf ball" is to you.  Any you don't eat right away can be frozen, and toasted or microwaved back to life (a little too hot too touch, pliable, maybe a little crispy, and tasty).

Ingredients:
2C masa harina* (Corn Flour - NOT corn meal.  If the corn has NOT been treated with lime, it will not work.  You will have gritty polenta cakes, not sopes)
1.5 - 2C pumpkin purée (depending on the coarseness of the masa harina - finer will need less, coarser - more.)
1 tsp baking powder
1 tsp salt
1/2 - 2/3 C fat (lard, oil, vegetable shortening - choose what you have or prefer to use.  I'm not going to argue about which is best.  I will say, if you go less than 1/2C fat to 2C masa harina, the texture, taste and durability of your sopes will suffer.  You may never know better, but someone will.  And the indignant Abuelas are always about.) 

Equipment:
clean hands
large mixing bowl
measuring cups & spoons
cookie sheet or 1/2 sheet pan (the cookie sheet of the gods - in my world)
oily/greasy paper towel (or a Silpat/silicone sheet liner)
[Stand mixer - if you are going to do a BIG BATCH, or would rather wash dishes rather than get your hands dirty, a stand mixer does this just fine!]

Prep:
Pour the masa harina, salt, baking powder into the big bowl.  Briefly stir together.  Start by adding 1.5C pumpkin purée to the dry stuff.  Squish and mix it together.  Add a little more purée - until you get that firm "play-dough" texture - or get something that looks like this:
easily holds its shape
when you break it in half it neither slumps or crumbles
and NO dry bits
Then, fold in and evenly distribute the fat of your choosing.
It should have a lighter fluffier feel and be a bit sticker once the fat is folded in.
Form into a large ball/oval.
Break in half.  
Break each of those halves in half.
Each of those 4 chunks need to be broken into 3 or 4 parts.  They should be "golf-ball" sized.
(Special APPETIZER PATROL NOTE: Instead of golf ball size, try marble size for mini sopes.  You'll get 48 - 64 depending on the size of your marbles.  Awesome appetizer bases - and bonus - gluten free, and cook ahead and reheat-able.)
(If going the greasy paper towel route - liberally grease your cookie sheets)
Each ball should be patted flat.  And then placed on the greased/Silpat-ed metal tray.  Pinch up the edges with your fingers.

(I am ignoring all Abuela related scorn.  I am doing it wrong.
I know.  I don't care.  My lunch is SO good.)
You can also press down the center with one hand,
and shore up the edges with the other.

There, like this...
done, done done, mostly done,
still to be done, still....
The most common instruction I see on the internet is "press down the center with a drinking glass." This was useless to me.  I didn't have a "drinking glass" that was sope sized, and mine all have indented bottoms anyway (Damn you Pottery Barn! or was it Crate & Barrel?)  And when I did find ramekins that were the correct size, they stuck.  And the rim was too low.  Yeah, the "press down" instruction is more trouble that it is worth.  Go with the Carpel Tunnel Prevention Therapy of actually working with dough.

Cook!
Heat up the oven to 350˚F.
Pop the sopes in for about 15 minutes.
Depending on their size they'll take 12 - 17 minutes.  You'll know you've hit the jackpot when you smell that tell-tale toasty corn smell.

several different sizes

So - what do I eat on a sope?

For me sope bliss was arrived at with my Oly Kraut cumin & jalapeño sauerkraut at the base (a stand in for the Mexican spicy vegetable escabeche), carnitas, and shredded cabbage and carrots, dressed with a little lime (photo at the top).

For the non meat eaters?  The sour/spicy/crunchy of the cumin jalapeño kraut (or vegetable escabeche), refried beans, jack cheese, and the cabbage & carrots.


And since I was doing so much sope testing, I was left with this:

After cooling -
bagged and into the FREEZER!
And then some were resurrected for a dinner of leftovers.  My son invented the chopped, pickled green bean, shredded pot roast sope - cabbage carrot slaw - of course.  But some went another route:

Left over kale & beet greens with carmelized onions & vinegar
Hey! I'm trying to take pictures here.  

Whatever else happens - the baked pumpkin sope has earned a place in my house.  Indignant DIL's of Abuealas be damned.