Thursday, August 7, 2014

Chard Gomae - Less Heat, More Yum

NorthWest Hipster Cooking Word of the Day - Osouzai

"You've probably never heard of it."
A phrase so obnoxious it has become its own joke.  It only happens because we live in the "Google it" age.  The person who said that to you only knows because they Googled it anyway.  (I was looking up something else - but yes, I only know because of Google too.)

Anyway, back to the "too hot to cook" problem.
One thing I have noticed over the years through cookbooks, videos, living and eating in Seattle, and travel - Japanese home cooks often work with:

ONE (1) burner!
And, Yes.  It is one of these portable babies,
with a can of compressed gas.
And they only seem to use  a sauce pan and a small fry pan.  Quickly.  OK... I know there is editing, but still - sheesh - I think I can get out of the kitchen FASTER with out sweating to death. And as I face WARM (for Seattle) weather, I continue to search for better ways to get out of the kitchen faster.

One answer for an "everyday" side dish of greens is the Japanese "sesame sauce" or in Japanese Goma-ae.  This is a pretty easy sesame topping for any ol' tasty, fresh, blanched green vegetable.
Spinach is the classic, but green beans, asparagus, cucumbers, broccoli, gai-lan, Napa cabbage, beet greens, mustard greens, etc. etc. etc....

And thus you get Osouzai - a cold vegetable side dish.

As you can see, I've got some cold pickles as well.
(On any self-respecting Japanese table,
these would be in 4 different bowls/plates.)
Recipes for the quick pickles are the next entry.

Add the sesame sauce and you have Osouzai Goma-ae (cold vegetable side dish with sesame sauce).

Since spinach is such a commodity, and a delicate fragile thing, it usually is not one of the things that shows up in my local Farmers Market or in my CSA box.  The Oxbow Box provided me with both chard and kale.  

I used the chard in my Oxbow Box for this.

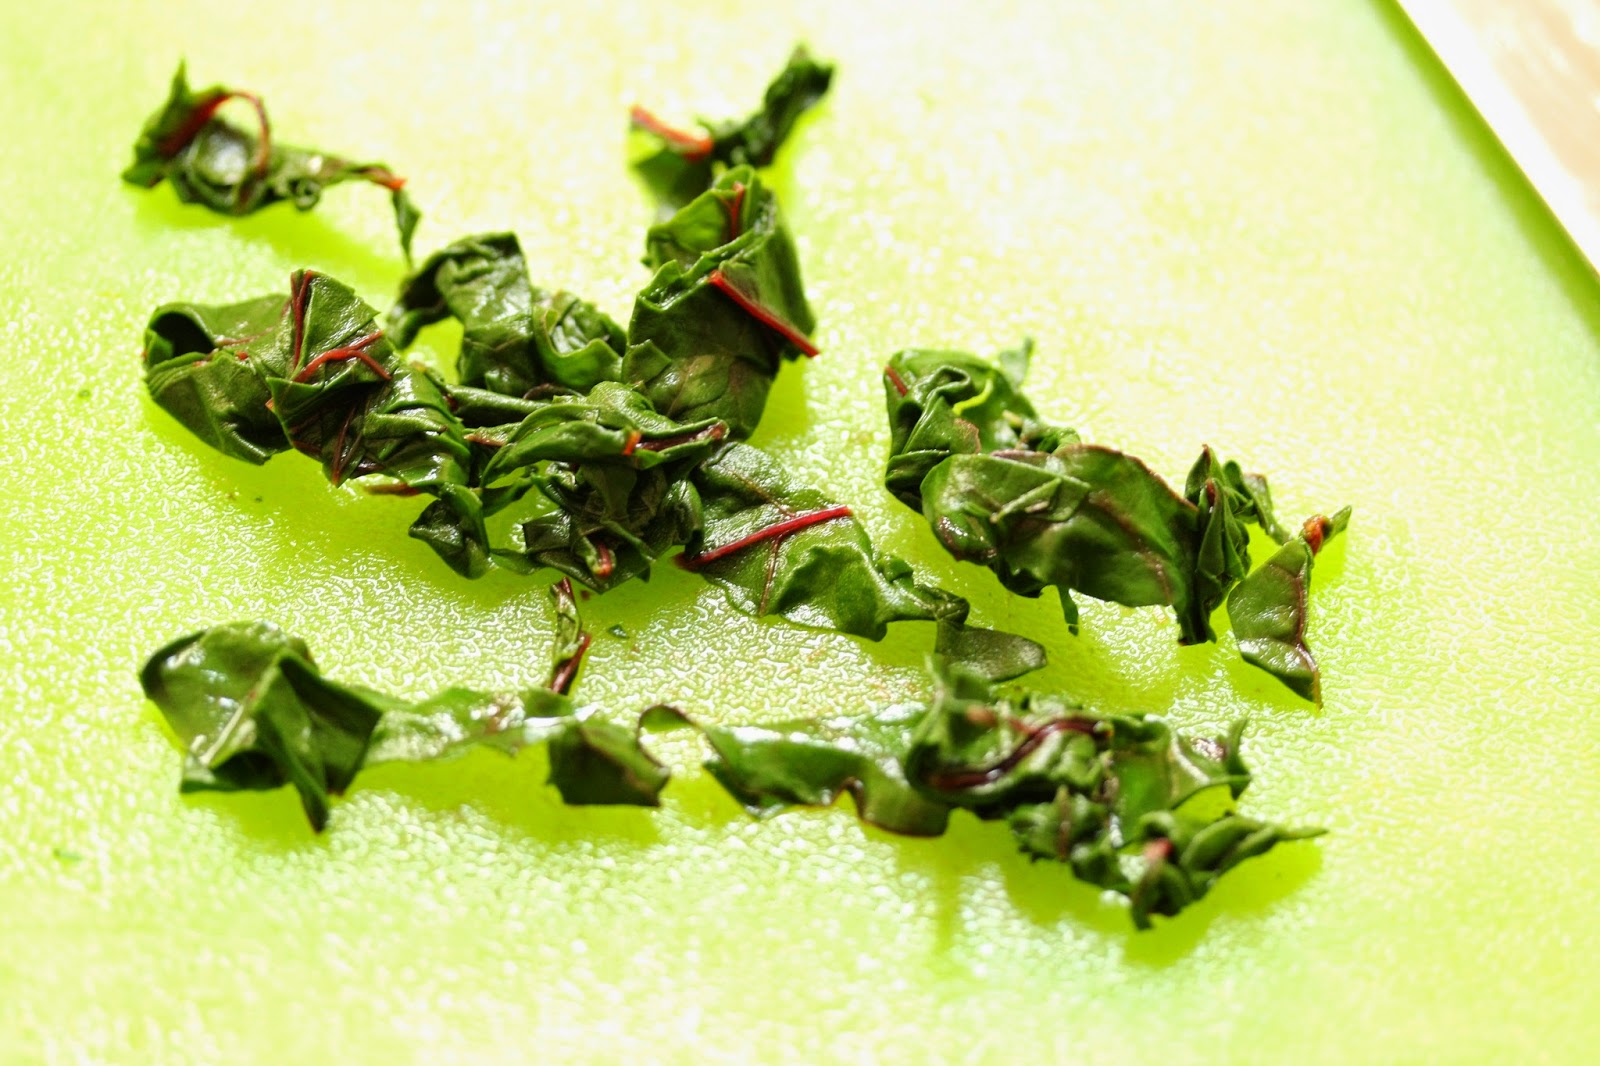
And guess what? A light blanch - in that small sauce pan of water, plus a gentle squeeze turns out to be enough.  

Even better news - these blanched greens are good for a few days in the fridge
So you can blanch all your greens when you get the box, and then use them
during the week.

I roughly chopped it


And gave it a quick toss with the delicious sesame topping. 

And I am out of the kitchen lickety-split.

Less heat & more flavor - just what I was after.  Check out the recipe.  Well - there are 2 recipes.  I'll give you the traditional one, and then the one more US cooks have the ingredients to pull off.  They are both very tasty, just different tasting.

Traditional Goma-ae ( or Gomae) - double this if you want 
(enough to dress a vegetable side dish for about 4 people)

Ingredients:
sesame seeds (white & black are both fine) - 3Tbs
dashi (or water)  - 2 tsp
sugar (brown) - 1 tsp
soy sauce - 1 tsp

Equipment:
small sauté pan
spice grinder/small food processor or Japanese suribachi mortar* (yeah - I don't have one either)
small bowl 
spoon or fork

Prep:
Put the sesame seeds in a dry pan over medium high heat.  

Keep an eye on the temp - well a hand.  When you can feel heat coming up through the pan by hovering your hand over it (about 3-4 min) start stirring the seeds.  When you start to smell toasty sesame seeds, pull them off the heat.

Cook!
When the seeds are cool enough to handle, pour them into your grinding apparatus.  
Grind until they look like ground pepper (stop before you get paste!)


Then stir in the rest of the ingredients.  Ready!
*my thanks to cookandsmile.blogspot.com for their fabulous catalogue of Japanese cooking utensils

Peanut Butter based Goma-ae
(If you have tahini, that'll get you even closer, OR heck, use any nut-butter you have handy.)

Ingredients:
smooth peanut butter - 2 Tbs 
soy sauce  - 2-4 tsp (depends on the saltiness of your peanut butter) 
sugar - 1-2 tsp (depends on the sweetness of your p.b.)
water or dashi - 1 Tbs 
sesame oil - 1 tsp

Equipment:
small bowl
for for mixing
microwave or very small pan

Prep:
Heat the soy sauce, sugar, water and sesame oil in the small bowl/pan.  It should be very hot to the touch, but need not be boiling.

Cook!
Smash and stir the peanut butter into the hot liquid.  Keep working at it until it is smooth.  This can take several minutes, so keep at it and don't despair.
Ta Da!  Delicious sesame peanut dressing.

Toss with your delicious greens.
Wednesday, August 6, 2014

Grilled Salad - Get me outta' the kitchen!

Why am I sweltering away in my hot kitchen when the cool evening breezes are starting to waft about my shady back deck?

Yeah - I don't have an answer either.  So it is time to head out to the grill for dinner.


The Oxbow Box provided me with my new favorite lettuce, Little Gem.  It makes me think of a mini Romaine - it has that sweet crunch, but in a more manageable size.  One thing that is fun (and tasty) with Romaine is grilling it until the cut side has black char marks.  The contrast of the sweet and charred is delicious.  I thought, since I was heading out of the kitchen, this would be the way to go!

Detour:
To go along with this - I did the butterflied/spatchcocked chicken.  By flattening the chicken it cooks quickly.  And rubbing a mixture of salt, pepper, chopped garlic, lemon juice and zest + a little oil under the skin and over the meat makes the chicken scrumptious, both hot, and cold as 2nd meal food the next day.

The first few time you flatten the chicken... it may take a little while, but after a few tries, the prep & the cooking will take less time than running out to get a rotisserie chicken.  (Check out this great, old school, instructional video - by one of the masters, Jaques Pepin.  You'll learn several great things.)

Back on Track:
So get out those Little Gem's, and slice them in half.

You can get them all washed off and any grit out this way.
Give them a firm shake to get the water out.

Rub them a little oil on all the surfaces (put about a 1/2 tsp in you hand, rub your hands together and then rub your hands over the lettuce halves.  You'll get everything covered, and use less oil this way).

Pull out the Patty Pan squash (or zucchini, or other summer squash),
slice into pieces about half the width of your pinky (1/8 inch or so), toss with a little salt and oil, and these are ready to go.

A hot grill is your best friend here.
Grill those veggies until they have distinct black marks - this will bring out their sweetness, and give them a delicious texture.

All you need now is delicious, cooling dressing to pull it all together.

Yogurt Dressing for Grilled Salad 

Ingredients:
thick yogurt (greek or drained regular) 1/2 C
parsley
dill or basil
garlic - 2 cloves
lemon juice or white wine vinegar 1-2 Tbs or to taste
salt & pepper to taste

Equipment:
small bowl
cutting board
knife
spoon

Prep & Cook!
Chop the herbs and garlic.  Stir them into the yogurt.  Start with 1 Tbs of the lemon juice/vinegar and a good pinch of salt and pepper.  Adjust the acid, salt and pepper to your taste.

All together now!


So quick note...

What if you have a grill with huge spaces between the grates?
Like I do.

Lodge Cast Iron to the rescue!  (No, they have no idea I'm mentioning this - it is just that good).  These pans are pretty indestructible.  You cannot damage them, no matter how hot your charcoal gets.  I mean, if you are trying to grill over lava (2100˚F), you have other things in mind, and I can't help you.

To cook smaller and more delicate things, I don't go in for some of these silly baskets, or breakable, rustable things.  I break out my big slab of cast iron.

 It preserves the grill experience, and I can use it on the stove as well.  (The other side is the pancake side.)
This side also works great for fish if you have something really delicate.
Oh, and if you just have a skillet

 bring it out the the grill instead.  No grill marks, but same great char - and OUT of the kitchen.

Monday, August 4, 2014

Cabbage Rolls - Updated

Hot Summer is here - and while the fruit is the star, all that sun grows amazing green stuff.
I have my paws on my OxBow Box and it is full of beautiful summer greens with a definite Italian theme.

My favorite sleeper produce of the summer is cabbage, and not just any cabbage, Savoy cabbage.

Here are these babies getting clean and crisp for market.

Savoy is the wrapping cabbage of choice.  And since I got a hold of the OxBow Box on a weekend, I had Time To Cook!  And so I did.

Italian Style Cabbage Rolls
I've loved the idea of cabbage rolls for awhile, but they are a huge pain to make, and so much of the filling is... wellllllll.... bland meatloaf.  And that is so sad.

But with the combination of Italian ingredients
zucchini
fennel


and of course the Italian parsley... I felt like it was time to do something about this.


Oh... and there was the thing where the tomatoes are so amazingly ripe they peel without a dip in boiling water
Ok... these were from the Farmers Market -
but LOOK local, ripe tomatoes! 
I've just gotta do it.

I had to take on the "cutting off the vein from the cabbage."

So blanch it for about 10 minutes,

drain and let it cool, then make sure you have a Sharp Knife

to cut off the thick vein

so it rolls well.

My 1st challenge was to make sure the vegetables were so tasty they were and important part of the filling.

I browned the HECK out of the onions
zucchini and fennel.
It was very important to cook down, soften and brown all the vegetables - half an onion, a banana sized zucchini- cubed - and thinly sliced fennel.

And unlike "traditional" rolls that are filled with a raw meatloaf that must be cooked for an hour or more... these could be assembled

not too much filling

fold over one side and roll

see how the edges are sticking up?

just poke it in like an
"innie" bellybutton

And then just baked (covered!) until heated through.  (20 min at 375˚F)*


I made a really simple fresh tomato sauce - because this is the ONE TIME OF THE YEAR!!!! I can.  I peeled them, pulled out the seedy-goo, and made a purée with the parsley, some of the fennel fronds, garlic and salt.

A little sauce on the bottom - a little sauce on the top
(yes, put sauce on all of them)
I baked it for about 20 minutes to make sure they were warmed through.


And NOW I did eat it all up!

(and the other dozen I made have gone to friends and family - and now I need to make more!)

* You can also make these ahead, and keep them in the fridge for a a few days - this time they need to be baked, covered, for about 45 min at 375˚F if they are coming straight out of the fridge.

OxBox Week!

This week I get to work my way through a box from OxBow Farms in Carnation, WA.  Let me tell you - there are moments where COOKING while faced with this heat (hey - NW girl here, 80˚F is hot  dude) has me a little worried.

On the other hand, it has me looking for options, and I might just come up with some surprising solutions.

Anyway... here's the box.  Waiting for me to get started.

This is a NICE box.  Gotta get it back to the farm.
And I got lucky...

I was able to go visit the farm:


This gave me a chance to see some of the veggies growing,


I got to see hints of things to come,


A chance for a quick science lessons,

Squash flowers -
this is a male flower
(How do I know? 2 ways)
1. It has pollen - and thus bees!)

2. It has skinny stems
 (Squash have male and female flowers - some varieties have male-only bushes and female-only bushes, and some varieties have both types of flowers on one bush.)

2.  And that pistil in the middle -
it is for collecting pollen.
The bees know there is no free pollen
and so don't visit as often.


This is a female flower
(How do I know? 2 ways)
1. See that little bulge?
That's a little baby squash


And a few things that are completely worth visiting OxBow Farm.

Check out the grape arbor!
(Part of the kids garden...
and Hey! those could be made into verjus.)

When should I visit?

At the Start of the Season for the Sow Down! (Mid-May)

Volunteer Days
2nd Saturdays of the month at the Native Plant Nursery: 10am - noon (+ a farm tour after!)

4th Fridays of the month with Ox Education in the Children's Farm:2pm - 4pm.(+ a farm tour after!)

or the Hoe-Down (Mid October!)

Friday, August 1, 2014

Zucchini & Charred Cherry Tomato Suace


HELLO! Zucchini.

Yup, it is THAT time.  Good news it is HOT here in the great Spongerific NorthWest.  Questionable news - here comes the zucchini.  I confess, I had long been a zucchini avoider, a “barely-tolerater”, someone who would work around or through it, but not enjoy it… until recently.

The main problem was that I’d been dealing with grocery store zucchini for years. Those zucchini can be bland, potentially fibrous flavor pits.  If not used properly they can suck the savor out of an amazing range of flavorful ingredients - stocks, Parmesan cheese, herbs.
I had never understood why, other than obligation , someone would, on purpose, voluntarily pay for and eat zucchini.

Then - I started getting farm fresh zucchini in my weekly veggie box I had to confront this food nemesis and figure out how to make it good.

It turns out... the secret is how much you cook it.  Zucchini is one of those special things that can get cooked both too much and too little.

When zucchini is tiny and tender and sweet and crunchy raw, it should be barely cooked – merely charred on the outside, and the inside should be sweet and crunchy, almost cucumber-like.  When these small sweet ones are cooked to softness, it is a pity.  So char them and eat them crunchy – that was my first revelation.

The second revelation was the bigger zucchini.  They still have that sweetness, but it is buried and must be coaxed out.  When not cooked long enough the large amounts of water makes the cooked zucchini somewhat bland and bitter.  Incompletely cooked eggplant suffers from this as well.  But that is another column for another day.


The answers for larger zucchini: cut them smaller – 


and use a cast iron or other heavy pan. 

And cook them longer. 
Cook it until it gets brown!
You've cooked off enough water
and brought out the sugar.
The results are almost unexpected; and it is the key to a deep, delicious zucchini tomato sauce you will be proud to share.

On the other hand - TOMATOES

Despite my whining, this year there are great tomatoes in Seattle.  And this year - it looks like there is going to be an amazing season!

Grow tomatoes? I confess,
totally beyond me.  MAJOR thanks to
Helsing Junction Farms of Chehalis, WA  &
Garden Treasures of Arlington, WA
And the acid, sweetness and flavor of a good tomato are more than a match for a zucchini.  IN FACT there is a whole category of Mediterranean cooking dedicated to the marriage of the two ingredients.


They also include garlic, oil, onions, pepper and/or eggplant.  Why fight such a delicious tradition?


Zucchini and Charred Cherry Tomato Sauce

Ingredients:

zucchini – 2 banana sized
cherry tomatoes – 1 pint (2 cups, same thing)
garlic – 2 cloves finely chopped or pressed
red wine – ½ C
salt – to taste
oil – 1.5 tsp & 1.5 tsp & 2 tsp
water – as needed

Optionals – tasty bread to char or delicious noodles or polenta, and excellent mozzarella (worth it this time).


Equipment:

heavy sauté pan – cast iron is best for the charring
2nd sauté pan (optional – but it allows you to work on the two vegetables at the same time)
lid or other splatter guard (optional)
cutting board
knife
spatulas or stirring spoons

Prep:

Rinse off the zucchini, rubbing off any prickly hairs.  Trim off the ends, and cut the sides to square off the sides.  Cut into 2 or 3 rectangles so each zucchini is manageable.

You are going for diced cubes.


Slice each rectangular box into slices thinner than your pinky (about 4), tip this stack on its side, and do it again so you get sticks.  Now cut these sticks into slices so you get cubes (or something like it).  The most important part is that you have small pieces about the same size and shape so they all cook pretty quickly.  The perfect cube will come with practice.

Smash or chop the garlic and rinse the tomatoes.

Cook:

(Note: if you have two sauté pans, cook both vegetables at the same time – and use the heavier pan for the tomatoes.  Otherwise, just follow the recipe.  Please don’t “throw it all in together” or the browning will not happen and it will be a very different sauce.)

Heat 1.5 tsp of oil in your heavy sauté pan over medium-high heat with a small piece of zucchini.  When the test piece of zucchini is sizzling, add half of the zucchini and about ½ tsp of salt.  Let the zucchini sit and cook for about 3 minutes – until a few pieces are starting to get a little browned.  Stir the zucchini and continue to cook it until the pieces are getting browned again – and so on.  If brown is sticking to the pan – this is good, and part of the plan.

When the zucchinis thoroughly browned and soft, add ¼ of the wine to dissolved the brown stuck on stuff.  If you need more liquid, add ¼ of water.  Keep cooking until most of the brown is dissolved.  Remove this zucchini sauce from the pan and repeat with the second half of the zucchini.  If the tomatoes go here, wipe out any large amounts of zucchini, and move on to the tomatoes.

For the tomatoes, heat up the last 2 tsp of oil over high heat.
When the oil shimmers – about 4 minutes – add the cherry tomatoes whole.  Let them sit for two minutes.  Shake the pan to roll the cherry tomatoes.  Let them cook until they char and burst.


Add the garlic, about a ½ tsp of salt, and cook it with the tomatoes until it mellows and the juice thickens. 
Turn the heat down to low.  Add the zucchini mixture back in, stir it together and taste for salt.  Add a little carefully until it tastes just right.

Sauce ready!

I tried eating this Charred Tomato and Zucchini sauce on some grilled bread
OW! That bread is hot!
Rub the grilled bread with a cut, raw garlic clove
for extra special flavor!

Mmmmm.... spiffy mozzarella over the sauce
on grilled bread.

Also - try it on some noodles.

 Wow, that is incredibly good!
(Oh yeah... and if you make a double recipe - this freezes and captures summer flavor!)