Showing posts with label tomatoes. Show all posts

Wednesday, August 13, 2014

Fruit Salsa Time!

Summer!  Summer, summer, summer-summer.
Oh, we all are such amazing cooks
(and better than average photographers)
when we get to work with food like this!
There was rain.  And it is still raining.  I feel so much more at home.

I've just about adjusted to all this sun, the early tomatoes, the super sweet fruit, the early peppers (sunny & spicy).  And then it rained.  That means I can keep freaking out about my hot kitchen.  But that's not going to stop me from making this warm (hot) weather deliciousness.

There's not much to say, except, "make fruit salsa."
And make it like you can't make it any other time of the year.


Oh, yeah - and if you have some crab (because it is crab season), use the beautifulness to go with your crab - because that's what I made it for the 1st time.  But some nice grilled chicken - or just with some fresh cheese (cotija, mozzarella, goat cheese) you cannot go wrong.  (Crab - quick how to clean, and a pretty awesome ceviche recipe as well.)

1.  Use tomatoes so ripe you can peel them without that dunk in hot water.


That means they will be softer than you are used to.
But do it - because just this once - you CAN!

2.  Use that fruit that's getting away from you.  This is where to use that fruit that's about to go south.  If it is especially juicy (sluuuuuuurp) fruit - cut on something that can catch the juice to add to your salsa.
Nectarines.  Peaches may get all the press,
but I love the little extra acid of the nectarines.
And the smooth skins.  The non-fuzzy skin is also a plus.

3.  It IS summer, so use your summer onion - the Sweet Onion.

4.  And explore your pepper options.  Ask about heat levels, and then choose what will make you happy.  

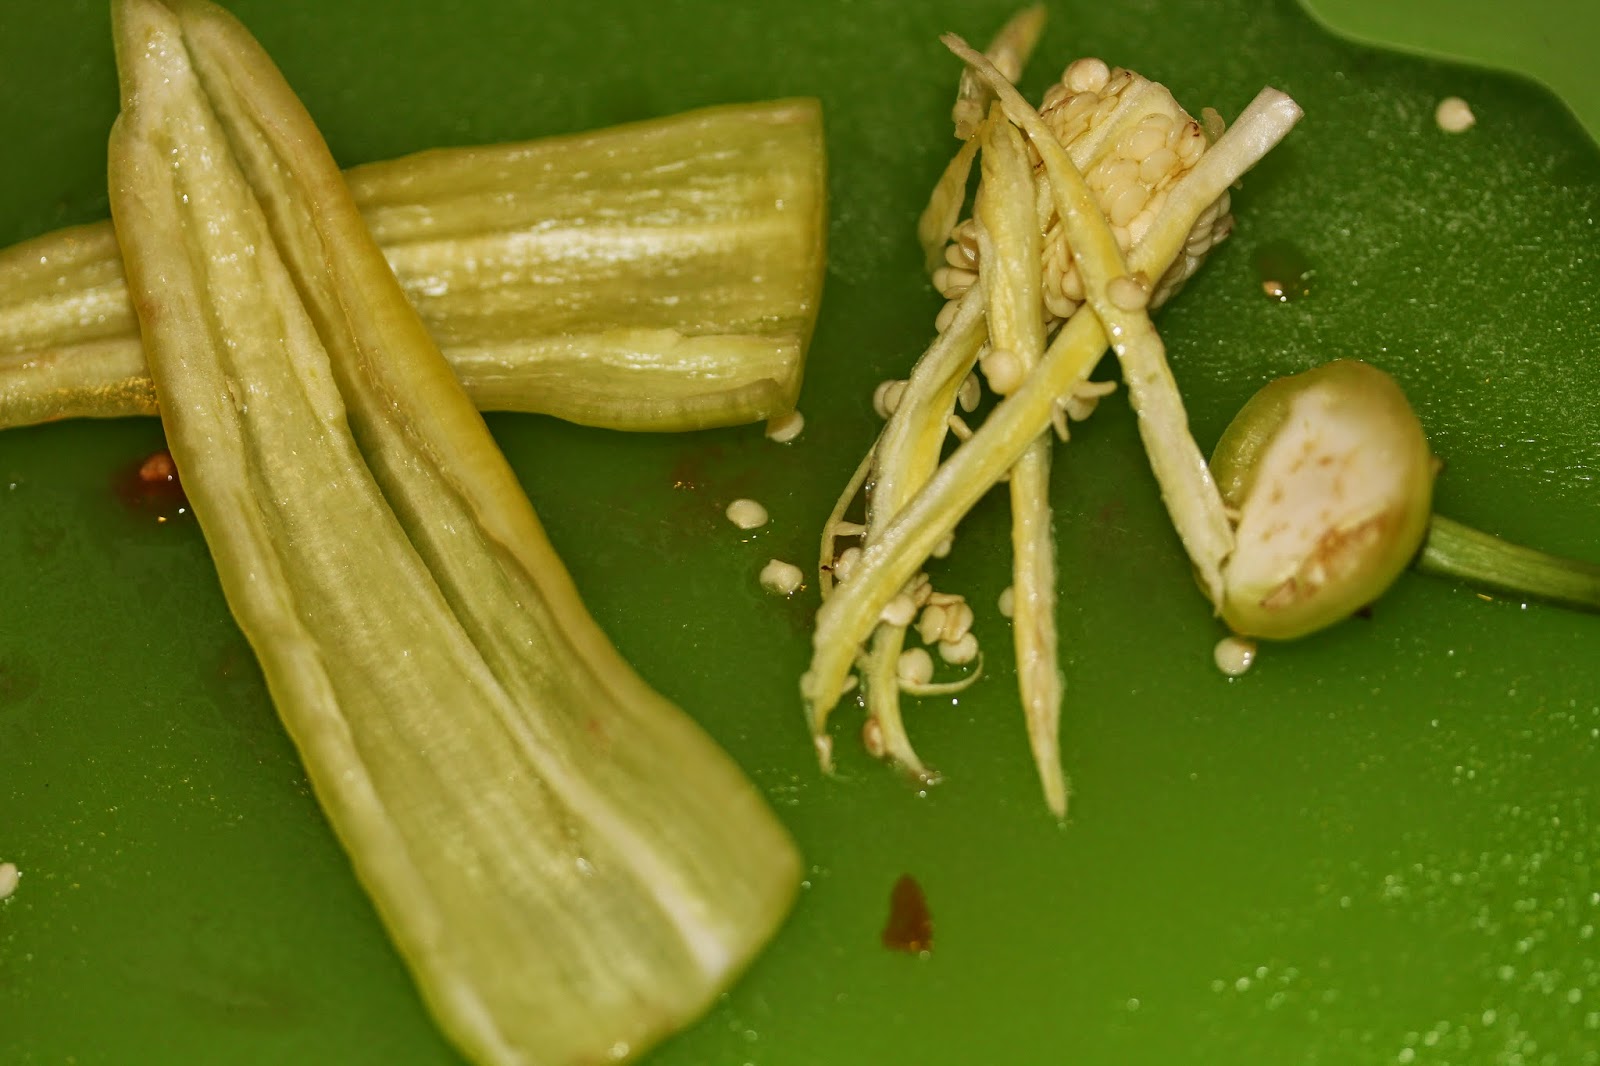
And if you want to get hotter - but regulate the heat, you can remove some of the pow-pow by taking out some, or most of the seeds and the white membrane.

The seeds have some heat.
But the most heat lies in the white membrane
that connects the seeds to the flesh.
Use this knowledge wisely - and to your advantage.

This is a much calmer pepper -
all the fruitiness, and less of the heat.
5.  Fresh herbs.  I used basil here, but oregano, parsley and even a little mint or fennel fronds can add that special something.

6.  Acid, Salt & Pepper.  You need a gentle acid - nothing too harsh.  Right now the salsa is pretty sweet, and you want to blend the acid with the sweet, not slash harshly through it.
Some good vinegars; white balsamic, champagne, or rice.  Maybe a little lemon or lime juice if you have it about.

Add salt (and pepper if you want) to bring it all together.

Oh summer.  You are lovely.

Friday, August 1, 2014

Zucchini & Charred Cherry Tomato Suace


HELLO! Zucchini.

Yup, it is THAT time.  Good news it is HOT here in the great Spongerific NorthWest.  Questionable news - here comes the zucchini.  I confess, I had long been a zucchini avoider, a “barely-tolerater”, someone who would work around or through it, but not enjoy it… until recently.

The main problem was that I’d been dealing with grocery store zucchini for years. Those zucchini can be bland, potentially fibrous flavor pits.  If not used properly they can suck the savor out of an amazing range of flavorful ingredients - stocks, Parmesan cheese, herbs.
I had never understood why, other than obligation , someone would, on purpose, voluntarily pay for and eat zucchini.

Then - I started getting farm fresh zucchini in my weekly veggie box I had to confront this food nemesis and figure out how to make it good.

It turns out... the secret is how much you cook it.  Zucchini is one of those special things that can get cooked both too much and too little.

When zucchini is tiny and tender and sweet and crunchy raw, it should be barely cooked – merely charred on the outside, and the inside should be sweet and crunchy, almost cucumber-like.  When these small sweet ones are cooked to softness, it is a pity.  So char them and eat them crunchy – that was my first revelation.

The second revelation was the bigger zucchini.  They still have that sweetness, but it is buried and must be coaxed out.  When not cooked long enough the large amounts of water makes the cooked zucchini somewhat bland and bitter.  Incompletely cooked eggplant suffers from this as well.  But that is another column for another day.


The answers for larger zucchini: cut them smaller – 


and use a cast iron or other heavy pan. 

And cook them longer. 
Cook it until it gets brown!
You've cooked off enough water
and brought out the sugar.
The results are almost unexpected; and it is the key to a deep, delicious zucchini tomato sauce you will be proud to share.

On the other hand - TOMATOES

Despite my whining, this year there are great tomatoes in Seattle.  And this year - it looks like there is going to be an amazing season!

Grow tomatoes? I confess,
totally beyond me.  MAJOR thanks to
Helsing Junction Farms of Chehalis, WA  &
Garden Treasures of Arlington, WA
And the acid, sweetness and flavor of a good tomato are more than a match for a zucchini.  IN FACT there is a whole category of Mediterranean cooking dedicated to the marriage of the two ingredients.


They also include garlic, oil, onions, pepper and/or eggplant.  Why fight such a delicious tradition?


Zucchini and Charred Cherry Tomato Sauce

Ingredients:

zucchini – 2 banana sized
cherry tomatoes – 1 pint (2 cups, same thing)
garlic – 2 cloves finely chopped or pressed
red wine – ½ C
salt – to taste
oil – 1.5 tsp & 1.5 tsp & 2 tsp
water – as needed

Optionals – tasty bread to char or delicious noodles or polenta, and excellent mozzarella (worth it this time).


Equipment:

heavy sauté pan – cast iron is best for the charring
2nd sauté pan (optional – but it allows you to work on the two vegetables at the same time)
lid or other splatter guard (optional)
cutting board
knife
spatulas or stirring spoons

Prep:

Rinse off the zucchini, rubbing off any prickly hairs.  Trim off the ends, and cut the sides to square off the sides.  Cut into 2 or 3 rectangles so each zucchini is manageable.

You are going for diced cubes.


Slice each rectangular box into slices thinner than your pinky (about 4), tip this stack on its side, and do it again so you get sticks.  Now cut these sticks into slices so you get cubes (or something like it).  The most important part is that you have small pieces about the same size and shape so they all cook pretty quickly.  The perfect cube will come with practice.

Smash or chop the garlic and rinse the tomatoes.

Cook:

(Note: if you have two sauté pans, cook both vegetables at the same time – and use the heavier pan for the tomatoes.  Otherwise, just follow the recipe.  Please don’t “throw it all in together” or the browning will not happen and it will be a very different sauce.)

Heat 1.5 tsp of oil in your heavy sauté pan over medium-high heat with a small piece of zucchini.  When the test piece of zucchini is sizzling, add half of the zucchini and about ½ tsp of salt.  Let the zucchini sit and cook for about 3 minutes – until a few pieces are starting to get a little browned.  Stir the zucchini and continue to cook it until the pieces are getting browned again – and so on.  If brown is sticking to the pan – this is good, and part of the plan.

When the zucchinis thoroughly browned and soft, add ¼ of the wine to dissolved the brown stuck on stuff.  If you need more liquid, add ¼ of water.  Keep cooking until most of the brown is dissolved.  Remove this zucchini sauce from the pan and repeat with the second half of the zucchini.  If the tomatoes go here, wipe out any large amounts of zucchini, and move on to the tomatoes.

For the tomatoes, heat up the last 2 tsp of oil over high heat.
When the oil shimmers – about 4 minutes – add the cherry tomatoes whole.  Let them sit for two minutes.  Shake the pan to roll the cherry tomatoes.  Let them cook until they char and burst.


Add the garlic, about a ½ tsp of salt, and cook it with the tomatoes until it mellows and the juice thickens. 
Turn the heat down to low.  Add the zucchini mixture back in, stir it together and taste for salt.  Add a little carefully until it tastes just right.

Sauce ready!

I tried eating this Charred Tomato and Zucchini sauce on some grilled bread
OW! That bread is hot!
Rub the grilled bread with a cut, raw garlic clove
for extra special flavor!

Mmmmm.... spiffy mozzarella over the sauce
on grilled bread.

Also - try it on some noodles.

 Wow, that is incredibly good!
(Oh yeah... and if you make a double recipe - this freezes and captures summer flavor!)

Saturday, March 3, 2012

Making Better (Chicken) Soup

Last week started with one of those rotisserie chickens.  I wondered why I don't buy them more often.  When I do, it seems like half my kitchen time disappears.  Boom! Dinner is almost instantly ready.

Oh right, I can only eat chicken all week every once in a while.
Lets face it - this is using far less energy per chicken
than if I were to cook it at home.

But when I do get one of those chickens -

Step 1 - Breast meat gets eaten first.  This lean mean dries out the fastest, so enjoy it at it's juiciest.  This time it got stirred in with a beurre rouge (red-wine butter sauce - which I had time to monkey with since the chicken was all cooked) and herby pasta.  Then lots of vinegary greens on the side.


Step 2 - Shred all the rest of the meat for fast access for the rest of the week.  I make 2 piles - larger pieces for sandwiches, etc. and smaller fussy pieces and all the juices in another for soup.

Step 3 - House favorite sandwiches.  Here that means chicken and swiss on flat bread.


Step 4 - And I hadn't done this in way too long - make soup!

It has actually been quite a while since I made soup from leftovers, and had forgotten just how darn simple it is.  Happily my recent cooking adventures have taught me a few tricks and this soup turned out much better than the variety I had stopped making.

Better Chicken Soup:
I went basically minestrone, but with chicken instead of beans.

How to make better soup?  Cook your vegetables so they are tasty!  Badly cooked vegetables are at the root of so many unenjoyable meals.  Develop the flavor in your vegetables when you cook them, don't just get them hot.  Anne Burrell really drives the point home when making her Pasta Bolognese.


Equipment:
soup pot
cutting board
knife
long spoon
(ladle - optional)

Ingredients:


lazy!  but tasty


Who knew?
Big bags of baby kales at Costco! 
when the freezer is empty
Dried herbs do great things for soups

1 C (or so) left over cooked chicken (bite sized pieces - dark meat is best)
4 - 8 C kale or other dark greens (spinach, chard)

1 Tbs Italian seasoning (basil, oregano, marjoram, thyme rosemary, savory & sage)
1 14oz can diced tomatoes (or equivalent)
1 Tbs oil
3 garlic cloves
1/2 large onion
1 C cooked small pasta (or rice/barley) or 1/2 C uncooked small pasta (shells, broken spaghetti, cous cous)
4 C chicken stock/broth
salt & pepper
(hard italian cheese & tasty olive oil for a fancy finish)


Prep:

Make sure the chicken is bite sized.   Wash the greens and strip the leaves off the tough stems (or get the baby kales!)  Cut or tear the leaves into palm-sized pieces.  Smash, peel and finely chop the garlic.  Cut the onion into smallish pieces. (Cut in thirds toward the root end, and the then slice thinly).
Open the can of tomatoes.  Drain most of the juice out of the can (add it to your broth, or toss it) and have the drained tomatoes ready to add to the soup.

Cook!

Heat the soup pot with the oil over medium high heat (I used bacon fat because it adds so much flavor.  A chopped up slice of bacon or two would also do a great job here as well.)  A sliver of onion in the pot will let you know when the oil is heated up and ready to go (by sizzling), usually about 4 minutes.
Add all the onion and stir over the heat for about 6 minutes - until the onion starts to soften and get a few brown edges.  Add the chopped garlic and Tbs of herbs.  Stir in for a few sizzles, then add the drained tomatoes.  Cook all the plant matter for about 10 minutes - until things look dry-ish and have a few browned spots.*
Stir in about a cup of stock, then add the kale.  Stir until all the kale is wilted and tiny.
Stir in the pasta and the rest of the broth.   Place a low boil if the pasta is uncooked - until the pasta gets cooked.
When the pasta is cooked, add the chicken and cook until the chicken is hot all the way through (just a few more minutes).


Ta-da better soup.


If you want to make this a little more special - grate some parmesan over the top, and drizzle a little tasty olive oil over the top.  Yum!

snobby oil, non-snobby price


We had this with cheesy garlic bread roasted under the broiler.


* Why all this vegetable browning?  It makes the most of the cooked flavors of the plants by driving out excess water and  caramelizing - or gently burning - the sugar inside them.
Adding vegetables to broth to cook is the same as boiling them.  It makes them water logged and often mushy and unpleasant.  Cooking them dry-ish, this way, is more like roasting or grilling them, and creates more flavors rather than stealing them away.

Wednesday, October 19, 2011

An Easier to Follow Calzone Recipe

I don't know what got into me when I put together that last recipe.  But if you found it a little hard to follow... here's the sane version:

Pumpkin-Ground Beef Calzones

Equipment:

Large Bowl
Knife
Cutting Board
Sauté Pan
Square baking pan
Counter Space - for dealing with dough
Small Bowl
Cookie Sheet (or Pizza Stone if yer fancy)
Measuring spoons - if you don't feel good guessing spice amounts.

Ingredients:

Calzones -
Pizza dough (make or buy)
Small "pie" pumpkin - the kind for eaten' not for looking' at.
1 lb ground beef (I'm betting lamb, pork or a combo are all good too - even turkey)
1 med. onion - purple if you can
Chili Powder (start w/ 2 tsp)
Smoked Paprika (start w/ 1 tsp)
Garlic Powder (start w/ 1 tsp)
Salt & Pepper (start w/ 1/4 tsp each)

Dipping Sauce -
Really ripe tomatoes
the spices you used in the calzones
- or -
Super basic tomato/marinara sauce with some chipotle salsa stirred in
-or - some variation to make a smoky, spicy tomato based dipping sauce.

Greens on the Side -
Dark green greens (whatcha' got - just know 1 lb = 1 Cup cooked)
A few cloves of garlic
2 tsp bacon fat or oil
Salt & Pepper
1/4 - 1/2 C water or stock
Splash of vinegar

Prep:
Preheat oven to 375˚F.
With the large knife, cut the pumpkin in half, and scoop out all the insides.  (See previous recipe for info on proper transformation of the pumpkin guts)
Place the pumpkin halves open side down in your baking pan with a small puddle of water (no higher than 1/4 in. (1/2 cm)).  Bake for 30 min, or until the flesh is fork tender, and the edges are browning a bit.  When this is done, set it aside to cool.
(This can also be done ahead, and refrigerated at this point for tomorrow)

Slice you onion into pieces thinner than your pinky.
Get all your spices out.
Wash and roughly chop your dark greens (Spinach, chard, beet greens, kale...)
Slice your garlic as thin as you possibly can, or mince it fine.
When the pumpkin is cool enough to handle, scoop the flesh off the pumpkin's skin, and mash it up roughly - so it is broken up.  (Don't worry if the flesh is a little under cooked, you will be cooking it the rest of the way as you continue.)

Cook!


Heat a saute pan, cook down a sliced onion (purple if you got 'em) and some sage in a little bacon fat (or oil) over med-low heat, until the onions are soft.  Brown the pound of ground beef.
Stir in the spices - in the starting amounts.  THen taste and add more of what you think it needs.  Mine needed more garlic, smoked paprika and salt.
Then stir in the pumpkin pulp you scooped off the skin after it cooled enough to handle.
Mash it up and stir it into the seasoned ground beef and purple onions.  Taste and adjust the seasonings until it makes you want to eat it all up right there.  Restrain Yourself.  
(Fillilng can be cooled and frozen at this point - so make double, and save some for later)


Get a clean expanse of counter very floury.  Divide up the dough into 6 pieces.  Make them into small circles.  Put A few tablespoons of the pumpkin-beef filling into the center.  Fold the circle onto itself, seal the edge by pressing down emphatically.  Fork tines help.  Repeat with other dough circles.

When your calzones are all closed up, poke them a few times to let air escape.  Place on a cookie sheet (or appropriate alternative) in the 375˚F oven for about 30 min., or until dough is in a GBD state (Golden Brown & Delicious).


The dipping sauce is only a matter of mixing the ingredients together to get a smoky, tomatoey dipping sauce.


For the greens, while the calzones are baking, start the sliced garlic in the bacon grease over med low heat - to slowly melt it.  When it gets floppy and mild, turn up the heat, add the greens to wilt them.  Add the liquid, and cover while the greens simmer until they are tender.  Take the top off, reduce the liquid, add salt pepper and a splash of vinegar to make them extra tasty.


Serve everything... and as the phoneticists say - "WA LAA!"

Thursday, September 22, 2011

Best Summer Burger!

Ah summer... there you go.  I start to wake up to a sunrise, rather than full light.  But the afternoons and evenings are still fine, and there's still time for a few more cookouts.

The Ultimate Summer Burger
Super ripe tomato on top, baba ganoush on the bottom
This takes all the beautiful end of summer flavors, and makes a smokey, sweet, rich salute to the end of the growing season.

O.K. Not so beautiful, but it was tasty!

Monday, August 1, 2011

Summer of the Green Tomatoes

Which is better than the summer of the wilted, baked garden.
But all the same I know North West gardeners are staring at their tomatoes (that didn't go down to blight in the 3rd week of July), and glaring at the calendar.

What to do with all the darn things?  (Check at the end for a freezer tip!)

Step 1:  Fried Green Tomatoes - Simplified

Crispy, crunchy, slightly sweet,
 pleasantly sour
and lovely tomatoness 

It was time to delve into the array of Fried Green Tomato recipes out there.  And many are these elaborate, double dipped, long soaking, deep fat frying, intimidatingly time chewing operations.  Great for the restaurant industry - but what does it do for the tomato?

Green tomatoes are nice and crunchy, but the secret is, the tomato goo, where the seeds live, is pleasantly sour.  And the seeds are immature and soft, so they don't have the seediness and bitter flavor that makes people want to remove them from the ripe fruit.

Coating them too thickly with batter and crumbs, then frying them for too long, and turning the tomato to mush does a disservice to the whole experience.

Fried Green Tomatoes in 10 Minutes Flat

Ingredients: For Each Tomato

1 hard, green tomato
1/3 C fine cornmeal (or 3 Tbs cornmeal & 3 Tbs flour)
1/2 tsp salt
1/2 tsp Old Bay seasoning (or 1/4 tsp pepper)

Enough oil to completely cover the bottom of your frying pan in a thin layer (2 Tbs of bacon drippings works for my 10" cast iron skillet).
This can be any high-ish smoke point oil - canola, peanut.  Including some bacony-goodness can only make things better.

Prep:

Mix together all the dry ingredients on a small plate, or in a small flat bottomed plastic container that is roomy around the tomato.
Slice the ends off the tomatoes, and remove the core (stem).
Cut the tomato into 1/4" slices.

Cook:

Heat your frying pan with the oil/fat over medium-high heat for about 4 minutes (check that it's hot enough by dropping in a little scrap of tomato.  If it sizzles - it is ready.

Dredge the tomato in the cornmeal mixture (Thoroughly cover the cut sides of the tomato with the cornmeal mixture).
Place the tomato in the hot fat, and let it cook for about 2.5 - 3 minutes.  Flip when the side is browned, but not too dark.  Cook the other side the same amount.

Drain on paper towels for a moment, so you don't absolutely torch the inside of your mouth.

Yum!

But what if I can't eat that many fried green tomatoes Right Now!?

Freeze them!  After you have dredged the tomatoes, place them on waxed paper on a flat pan - with teh waxed paper separating layers, you can go 2 or 3 high.   Place this in the freezer for at least 5 hours (Overnight is better).  Store them in layers - still separated by the wax paper - in zip-top bags.  Remove as much air as possible from the bags.

When it's time to cook, fry them straight from frozen.  (Do Not Thaw!)  You will need to fry for the whole 3 minutes, and MAY need tp add an extra flip, re-frying the first side of each slice for an additional minute.

Can you imagine, Fried Green Tomatoes for Thanksgiving!

Thursday, September 9, 2010

Quinoa, Arugula and Veggie Salad... The Recipe

The basics for this off the cuff keeper:

Ingredients:

2 C cooked quinoa
2 handfuls arugula or other bitter/spicy green - rinsed & torn
1 large handful cherry type tomatoes
1 small cucumber
1/4 C chopped onion (any kind)
2 cloves garlic
Tasty vinegar (sherry, rice, champagne etc... just not white and not too harsh)
salt, pepper
a few slices bread (tortillas work too)
1/4 broth or water
Oil for cooking (I suggest bacon drippings - or use a little sesame oil with regular cooking oil)
Parmesan or other hard grating cheese

Equipment:

Knife
Cutting Board
Sauce pan w/lid
Garlic press (optional)
Cheese Grater
Medium bowl + utensils for tossing/serving the salad

Cook!

Brown the onion in the oil over high heat, then add the greens to wilt.
Turn down the heat to medium, crush the garlic into the greens and stir to combine.

Add in the quinoa.  If it is too dry, add about 1/4C broth or water, and cover over low/very low heat.
Slice the tomatoes in half (this is where they got scooped out with the melon baller).
Slice the cucumbers into bite sized pieces (more or less) sprinkle them with 1/2 tsp of salt, and 1 tsp of vinegar.  Taste and adjust.  Set aside.

Check the quinoa, and if the liquid has been absorbed, turn off the heat, and stir in the tomatoes.
Taste and check for flavor.  Add pepper and vinegar to taste.  Grate in some parmesan and taste again before adding any salt.  That may do the trick.  (It did for us between the salt in the bacon and the broth).

Fry the bread/tortillas in a little more oil (or just toast them).

Serve the salad with the cumbers on the side or mixed in.
Grate on some more parmesan, and use the bread to help you eat it all.

Sliced nectarines & plums make a fabulous finish!  We actually had some honey yogurt with these - but got so excited, we forgot to take pictures of that...

The CSA bag Arrived!


...and no zuchinni, and YES tomatoes!

Sure yellow tomatoes, and peaches and plums and lettuce and....


Anyway, when it was time to make dinner, this was inspiring, but not dinner.

A quick peek in the fridge revealed a hodgepodge:

Pre-cooked quinoa I had vacu-bagged and frozen (and thawed),
left over onion,
bacon drippings
and some left over hot-dog buns (bakery kind),

along with the arugula, cucumbers and tomatoes from the bag

- and throw in some garlic.


So far so good - except my son doesn't like the "smoosh"
of the seedy part of the tomato.  This melon baller to the rescue.

(Before I had a kid... suck it up kiddo.  Now that I'm doing the mom thing, if it'll get you to eat something I really like, I'll meet you half way.)

So instead of just throwing in the little yellow tomatoes whole, I sliced 'em in half, and scooped out the "smoosh."  It helped that the boy helped.

 (Trivia alert:  At one point chef's were trying to pass off this stuff as "tomato caviar"  And yet the French have a specific process for removing this as an undesirable part - along with the skin - concasse. Huh)

Back to dinner:

Saute the onion in a bit of the bacon drippings. Brown edges on the onions says I'm ready for...
About half of that arugula torn up and thrown in the pan, wilt it.

Shrapnel from the smashed bag of frozen broth.
The boy likes to bang them on the counter.


Turn down the heat and pour in the quinoa.
It was pretty dry, so I broke up a ziploc bag of frozen broth and tossed in a few pieces of broth-ice-shrapnel.
Cover with a lid, and let the liquid soak into the grains.


Now all it needs is a fork!
While that is warming away, chop  chop up the cumber into wedges, sprinkle with a little salt and sherry vinegar.

Toss the tomatoes into the warm quinoa & friends, move it to another bowl, because I ended up having to fry the bread in a little more of the bacon drippings.

The salad needed a little vinegar too, along with some pepper.  It needed a little salt, but we went with some parmesan instead because that was more fun.

A useable recipe follows in the next post...